Let Sino's Lamination Stacks Empower Your Project!
To speed up your project, you can label Lamination Stacks with details such as tolerance, material, surface finish, whether or not oxidized insulation is required, quantity, and more.
If your electric motor is making strange sounds, shedding power, or just will not begin, a faulty armature can be the culprit. The armature winding is a crucial part of your motor. This short article is my way of sharing straightforward steps to look for a damaged armature. You’ll find out how to detect the indications and do some fundamental tests. It deserves analysis since comprehending this can conserve you time and perhaps even some cash on motor repairs. Allow’s determine if your motor armature needs some attention!
When a motor starts acting up, it’s discouraging. Possibly your motor hums however won’t rotate. Or perhaps it sparks a lot near the brushes. Often, the motor could overheat rapidly or lose its power, suggesting it does not have much torque. These are all ideas that you could have a faulty armature.
A problem with the motor armature can trigger all sorts of issues with your motor’s efficiency. The motor may run rough, or it might not run at all. If you’re experiencing any one of these indications with your motor, it’s a good idea to examine the problem of the armature. Capturing a faulty armature early can often prevent even more damage to the motor. This is why learning to check for a damaged armature is so handy. Keep in mind, the rotor part of your motor is commonly the motor armature, and it’s vital.
So, what is this motor armature we’re talking about? In numerous DC motors, the armature is the component that rotates. Think about it as the heart of the motor. It’s generally made from a central armature shaft, a stack of metal plates (the core), and copper winding (made from lots of coil turns) twisted around the stack. At one end of the armature shaft, you’ll locate the commutator, which is a ring of copper bars (or segments). The motor brushes ride on this commutator to get power to the winding. The rotor interacts with the magnetic field from the stator (the stationary component of the motor) to make the motor turn.
Why does a motor armature get damaged? Overload is a big one– if the motor works too hard, the armature winding can overheat. This warmth can harm the insulation on the cables in the coil. Often, bad airflow suggests the motor can not cool down. Worn commutators or bad/worn brushes can cause sparking and damage. Even a bearing failure can lead to problems if the rotor scrubs against the stator. The armature design itself attempts to avoid these, but points take place. Over time, the insulation can damage down, leading to a short in the winding. The consistent spinning and electric forces can additionally result in fatigue at the coil’s connection point to the commutator bar.
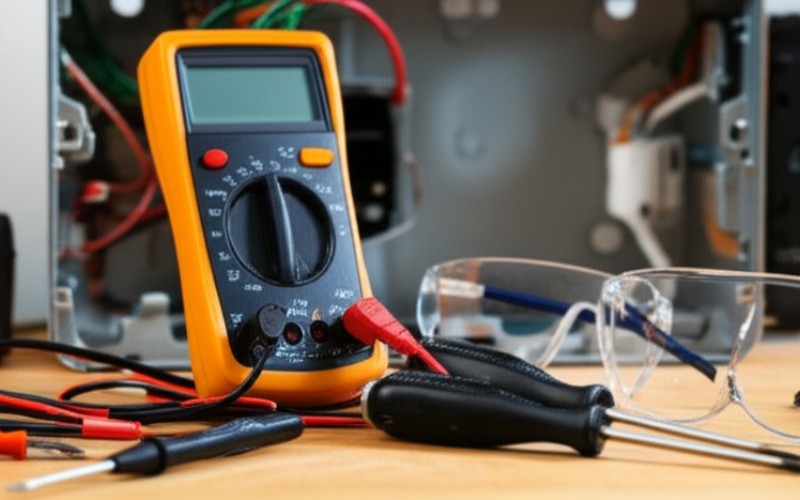
Good information! You don’t require a lot of elegant devices to do some standard checks on your motor armature. One of the most vital devices will be a multimeter. This meter can determine resistance (in ohm units) and check for continuity. This aids me locate a short or an open coil.
You’ll additionally want some great lighting, like a flashlight, to see clearly inside the motor and inspect the motor armature. A magnifying glass can be helpful for finding little cracks or burn marks on the winding or commutator. Naturally, you’ll need basic hand tools like screwdrivers or wrenches to open the motor housing if you need to obtain the motor armature out. Constantly make sure the motor is unplugged from power prior to you begin! Safety initially is my adage when working on any electrical gadget, especially a motor.

Often, you can detect trouble with the armature windings simply by looking. Carefully take a look at the copper winding on the motor armature. Are any cords damaged or burned? Search for dark spots, which can imply a coil has actually been overheating or degradation has set in. Inspect where the coil wires attach per commutator bar. These connections should be strong.
Additionally, look at the insulation on the winding. Is it fractured, flaking, or missing in areas? Damaged insulation is a large red flag, as it can cause a short where the winding touches itself or the metal core of the armature. In some cases a part of the winding could look different from the remainder. If you see anything that looks like a damaged or burnt coil, that’s a solid sign of a faulty armature. The armature winding is essential for the motor to produce torque.
The commutator and brushes are listed on my examination listing for any motor. The commutator is that ring of copper sections at one end of the motor armature. As the rotor spins, the brushes rub against the commutator to pass electric current to the armature winding. Look closely at the surface of the commutator. Is it smooth, or is it rough, grooved, or have worn spots/areas? Are any of the copper commutator bars raised or loose? Severe wear or damage here means the motor armature functioning properly is not likely.
Examine the brushes too. These are generally small carbon blocks. Are they worn very short? Are they chipped or split? The rubbing of carbon brushes against the commutator creates wear with time. If the brushes against the commutator surface area don’t make good contact, your motor will have problems. Poor brush contact can cause sparking, which can further harm the commutator bars and the motor. A healthy commutator and great brush contact are important for a pleased motor.
Currently, allow’s ventures out that multimeter, our dependable meter. A short in the armature winding is a common problem. This suggests some cords in a coil are touching where they shouldn’t, typically because the insulation breaks. This creates a path for electricity that’s too simple, which component of the winding will not do its job right. A shorted winding scenario can trigger the motor to draw excessive current, get too hot, shed power (less torque), or perhaps journey a breaker. The motor may battle.
To test for a short within a coil or in between coil segments using a basic meter, it’s a little bit complicated without customized equipment like a growler. However, very low resistance value readings consistently across many commutator bars (if you are doing a bar-to-bar test, reviewed next) can sometimes point to shorted windings in the dc motor armature. If one coil is shorted, it will certainly commonly have a much lower resistance than various other coils. A short can seriously influence the magnetic field required for the motor to operate. Proper insulation is crucial to prevent a short. The stator of the motor likewise has windings, and they too can develop a short.
Another problem in a motor armature is an open circuit in a coil. This means there’s a break in the cord of a coil, so electricity can’t move with that part of the winding at all. If a motor has an open coil, it will likely run very badly, jerk, or spark excessively at the brushes against the commutator surface. The motor may try to rotate but will certainly not have smooth power or torque.
To check for an open coil, you’ll use your multimeter set to measure resistance (ohms) or the continuity setting. You are looking for electrical connection to the armature via each coil. You’ll do this by touching the probes of your meter to surrounding commutator bars. You need to obtain a low, constant resistance value for every coil. If you discover an area where the measurement shows very high resistance or “OL” (open line/load), that indicates there’s likely a break in that coil or its link to the commutator. That coil is not completing the circuit, which is bad news for your motor. This is a crucial examination to inspect the condition of the armature winding.
This is one of my go-to examinations for a DC motor armature: the bar-to-bar resistance test. It helps me locate opens, shorts, or high-resistance links in the armature winding. To do this, establish your multimeter to a low ohm range. After that, you will determine the resistance between adjacent commutator bars. Location one probe on one commutator bar and the other probe on the very next bar. Keep in mind the resistance value.
After that, relocate your probes to the next pair of two commutator bars, and so forth, functioning your method around the whole commutator. You need to check the resistance of every adjacent pair. All the readings ought to be extremely similar, usually a low resistance worth. If you find a measurement that is much higher than the others, you likely have an open coil or a poor connection to that commutator bar. If a reading is significantly lower (near zero ohms), it can indicate a shorted coil. This bar-to-bar test provides a good picture of the health and wellness of the armature winding in your motor. Make certain to examine every commutator bar.

The last electrical test is to inspect if the armature winding is shorted to the armature shaft or the motor armature stack (the steel core). This is frequently called a ground fault or a short to ground. The copper winding should be entirely insulated from the armature stack and the armature shaft. If the insulation stops working and a cable touches the metal core of the armature, electrical power can leak to the motor frame. This is dangerous and can create the motor to trip breakers or not run properly.
To do this examination, establish your multimeter to its greatest resistance (ohm) setup. Area one probe on the tidy metal surface area of the armature shaft or the stack. Touch the other probe to each commutator bar, one by one. You want to see an extremely high resistance value, ideally “OL” (open loop or boundless resistance). This means the winding is effectively insulated from the armature stack. If you obtain a reduced resistance measurement between any type of commutator bar to the iron core (or bar to the iron armature), it means there’s a short to ground. This insulation breakdown implies that a component of the winding is touching the iron armature stack directly, and the motor armature is faulty. This last examination is vital for safety and proper motor operation. We need to insulate these parts well.
Occasionally, even with these checks, you might find the motor armature is functioning correctly, but your motor still has problems. What after that? Well, the motor armature is simply one part of a complicated motor. The issue might lie somewhere else. For example, the stator (the fixed part of the motor which has field windings or permanent magnets in the motor) might have a fault. The stator winding can additionally create shorts or opens, triggering the motor to stop working.
Various other things are worn bearings. A bad bearing can create the rotor (the armature) to drag or seize, putting a massive drag/excessive load on the motor. There can be issues with the brushes not seating correctly, even if they look all right. For some kinds of motors, specifically in cars, a regulator failing or troubles with the voltage supply might be the issue, not the motor itself. If you’ve examined the dc motor armature thoroughly and it seems fine, it might be time to look at these other parts of the motor system or even the external electrical circuit feeding the motor.