Let Sino's Lamination Stacks Empower Your Project!
To speed up your project, you can label Lamination Stacks with details such as tolerance, material, surface finish, whether or not oxidized insulation is required, quantity, and more.
Is your DC motor not working? Before you throw it out and get a new one, you have another option. You can fix it with an armature rewinding. This job can save you a good amount of money. It can make your old motor work again. This guide will show you all about how to rewind a DC motor armature. We will walk you through each step with easy words. You will find out what tools you need, what information you need to get, and how you can do the rewind job. This article will make a hard job feel simple.
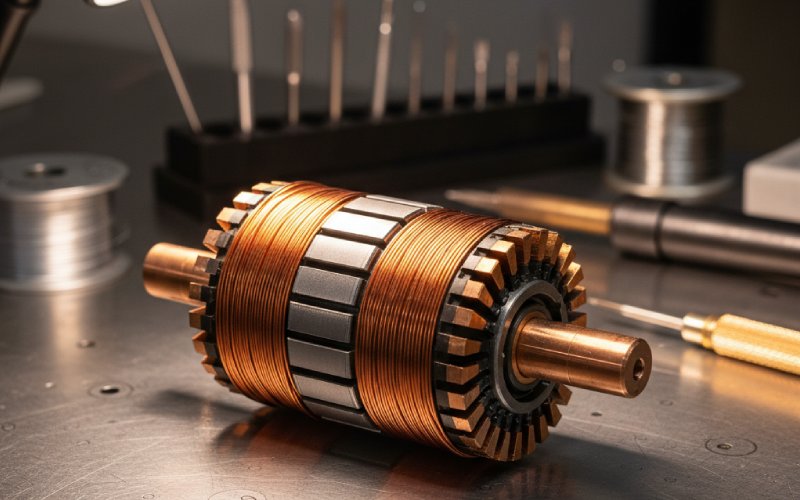
An armature is the part inside a DC motor that spins around. It is a very important part of any electric motor. The armature has a lot of loops of copper wire wrapped all around it. These loops of wire are called a winding or a coil. When electric power goes through this winding, it makes a magnet-like force. This force pushes on other magnets inside the motor. This push is what makes the armature spin. This spinning gives the motor its power. You can see an armature in a lot of power tools and small DC motors.
After a lot of use, this winding can go bad. The motor could get very hot, and this can melt the plastic cover on the wires. This can make a short circuit. The motor could also just be very old, and the winding can snap. When the winding is broken, the motor will no longer work. This is the time when an armature rewinding is needed. An armature rewind is the job of taking out the old, broken winding and putting in a brand new one. This kind of electrical repair can make an old motor run just like it is new. It is a normal job for a motor repair service.
Choosing to rewind a motor means you need to think about a few things. First, think about how much it costs. A new motor can cost a lot of money. A rewind is often a lot cheaper. This is very true for a big or special kind of motor. An armature rewinding service can give you a price for the job. Second, think about the motor itself. If it is a very old motor or one that is hard to find, a rewind may be the only thing you can do. A rewind can let you keep the motor’s original parts, which can be a very big deal.
But, armature rewinding is not always the right thing to do. For a very small motor or a cheap one, the repair cost could be more than the price of a new one. Also, the rewind must be done the right way. A bad rewind job will not last a long time. If you want to do the rewind on your own for the first time, you need to be very careful. A good rewind job will give you a motor you can trust that works for many more years. It is a very good way to save money and your tools.
To get started with an armature rewind, you need to have the right tools and information. When you have all your things ready, the job will be a lot easier. The tools will help you take the armature apart and then put it back together. The information is very important to make sure the new winding is just like the old one. If the new winding is not the same, the motor will not work the right way. Its speed and its power will be wrong.
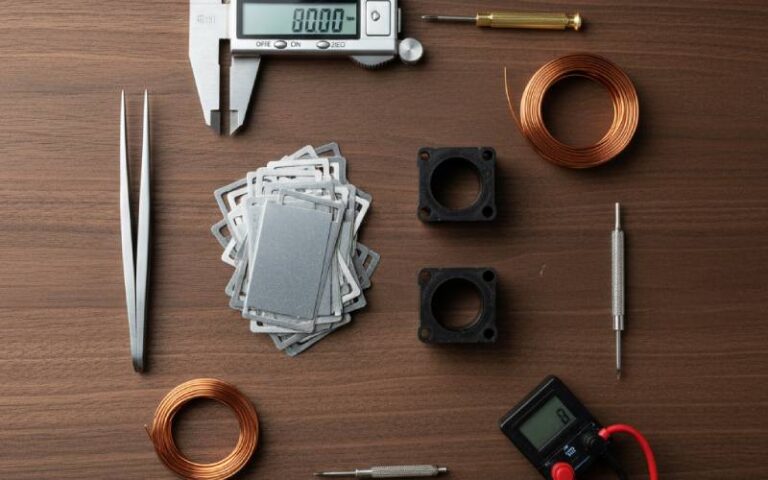
Before you take off even one wire, you must get information. This is the biggest step of the whole repair. You have to write down all the small things about the first winding. This means the wire size, how many turns are in each coil, and how the coil hooks up to the commutator. Taking photos can also be a big help. Below is a table that shows tools you might need and a list of the information you have to get.
| Tool | What It’s For |
|---|---|
| Bearing Puller | To take bearings off the armature shaft safely. |
| Vise | To hold the armature so it does not move while you work. |
| Wire Cutters | To snip the old coil wires. |
| Calipers or Micrometer | To find out the exact thickness of the copper wire. |
| Small Hammer & Chisel | To carefully take old winding out of a slot. |
| Winding Machine | To help wrap the new coil the same all the way (you can do it by hand). |
| Growler Tester | For testing the armature to find shorts after you rewind it. |
Important Information to Get:
After you have all your information, you can get the armature ready. This means taking out the old, broken winding. You have to do this very carefully to make sure you don’t cause more damage. Any new scratches or marks on the armature or commutator can make problems later on. The first thing to do is to carefully cut the old coil wires where they hook up to the commutator. Write down which wire goes to which bar.
Next, you have to pull the old winding out of the armature slots. This can be hard to do. Sometimes the old winding is stuck hard with old varnish. You may have to warm up the armature a little bit to make the old varnish soft. Then, you can use a small tool like a chisel or a hook to pull the wires out from each slot. You have to clean every slot all the way. No old wire or old insulation can be left there. A clean armature is ready for a new start. Make sure every slot is clear and smooth.
The commutator is a really big part of a DC motor armature. It looks like a circle made of copper bars on one end of the armature. Each bar is not touching the others. The job of the commutator is to change the way the electric power flows in the winding while the armature is spinning. This change is what keeps the motor turning in the same direction. The DC motor would not work at all without the commutator.
When you do an armature rewind, the commutator needs you to look at it closely. You have to check it for any damage. Look for bars that look burnt, or see if any bars are not tight or are sticking up. Also, look at the spaces between the bars. These spaces need to be clean. If the commutator looks bad, it might need a repair or you might need a new one. After you wind the new coil, its wires have to be hooked up to the commutator bars in just the right way. A good hook up to the commutator is something you need for a good motor repair.
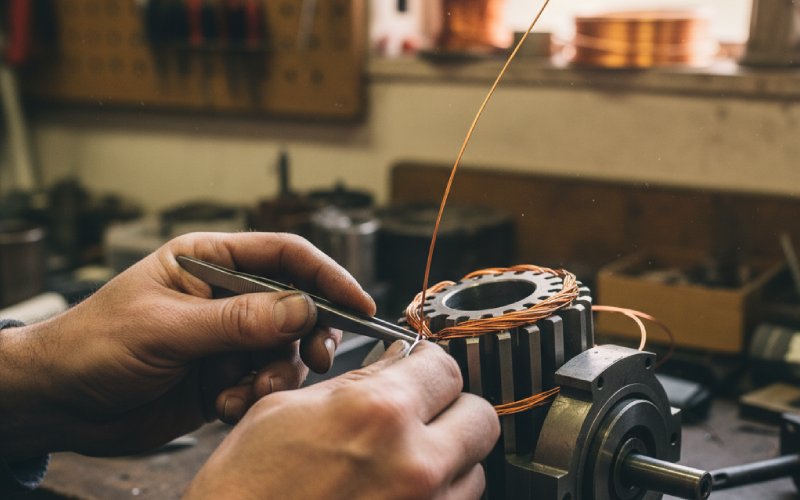
Winding the new coil is the biggest part of the armature rewinding job. For this step, you have to take your time. You will use the information you got before. You need to get new copper wire that is the same size as the old wire, with no difference. You also need to get new insulation paper to put inside each armature slot. This paper keeps the new winding safe and stops it from touching the metal part, which would make a short.
You can start by putting the insulation paper in the right slots. Then, start to wind the new coil. You have to wrap the wire the right number of times for every coil. Count each wrap carefully. How tight the wire is matters too. It should not be very loose, and it should not be very tight. A winding that is the same all over is a big part of having a good armature and a motor that runs well. You will make one coil at a time. You will put it into the armature slots just like the old winding was. Take your time to make sure the winding looks good.
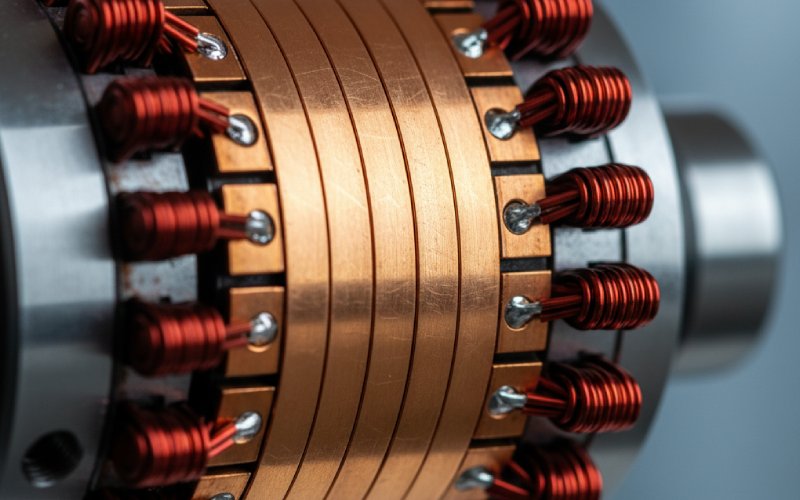
After the new winding is all done, the next thing to do is to hook up the coil wires to the commutator. This hook up is very, very important for the motor to work. Every coil has a wire where it starts and a wire where it ends. These wires must be hooked up to the right commutator bars. This is the reason you wrote down the hook up information when you started. If you hook them up to the wrong bars, the motor’s electrical timing will be wrong.
To hook it up, you first have to take the plastic cover off the very end of each wire. Then, put the wire into the little slot on the right commutator bar. Make the wire stay put. A lot of times, this is done with soldering. Soldering makes a strong electrical connection you can count on. You must make sure the solder is clean. It cannot go across the space between two commutator bars. That would make a short circuit. After all the hook ups are done, look at them one more time to make sure it is all perfect. This careful work is what makes a good rewind service.
Once the new winding is where it should be and is hooked up to the commutator, the armature is almost done. The last things to do are to hold down and keep the new winding safe. First, you might have to put bands around the winding to hold it still. This is normal for a motor with high speed. The bands stop the coil wires from flying out when the armature spins really fast.
The biggest last step is to insulate the whole winding. You do this by putting on a special liquid coat called varnish. The armature is put into the varnish, and the varnish gets into every little part of the new winding. Then, the armature is put into an oven to bake. The heat makes the varnish hard. This varnish does two things. It holds all the wires so they cannot shake. It also adds another layer of electrical insulation and keeps the winding safe from water and dirt. This last coat is what makes the rewind a strong repair that will last a long time.
You should not ever put a rewound armature into a motor before you test it. The last testing is how you make sure your repair worked. If there is a problem, it is a lot easier to fix it now. It is much harder after you put the whole motor back together. The first test is to just look at it. Look for any wires that are loose or bad solder spots on the commutator. Make sure it all looks good and tight.
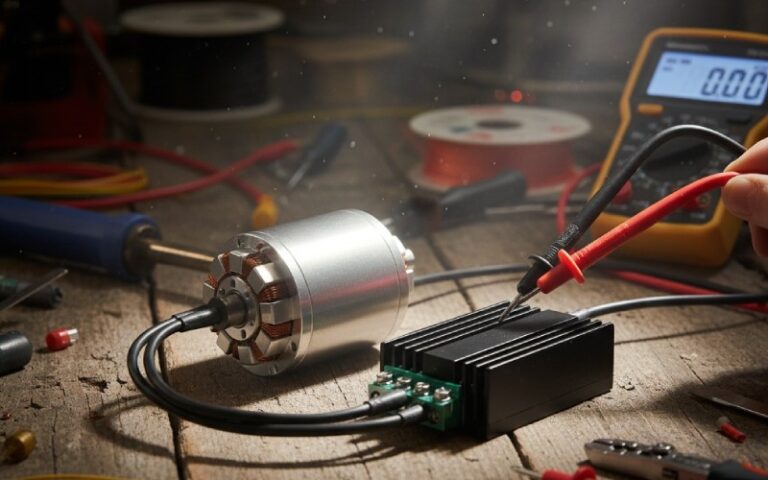
Next, you have to do some electrical testing. A special tool called a “growler” is used to do this. A growler can check for shorts in the armature winding. It can also check for open circuits. An open circuit means a wire is broken or is not hooked up. You should also use a tool called a multimeter to check for a short to ground. This test makes sure no part of the winding is touching the metal part of the armature. If the armature is good after all these tests, you can feel good that your armature rewinding job was done the right way. The motor should have all of its power now.
Doing an armature rewind yourself can be a job that makes you feel good. But, it is not for every person. The work needs special tools, a lot of taking your time, and you have to look at all the small things. If you don’t feel good about doing detailed electrical work, or if you don’t have the right tools for testing, it could be a better idea to find an expert. A local motor rewind shop has the know-how and tools to do the job right.
You should find a local shop if the motor is worth a lot of money or is very important for what you do. An expert service will usually give you a promise that their rewind work is good. This helps so you don’t have to worry. A good shop can also find other problems with the motor that you did not see. They can service the whole motor, not only the armature. For a big motor, a hard-to-understand motor, or a very important motor, an expert rewind shop is often the best and safest thing to do. They can do a very good repair job and get your machine working again fast.