Let Sino's Lamination Stacks Empower Your Project!

To speed up your project, you can label Lamination Stacks with details such as tolerance, material, surface finish, whether or not oxidized insulation is required, quantity, and more.

How Does a Magneto Stator Work?

If you ride a motorcycle, run a dirt bike, or wrench on small engines, there’s a hidden hero quietly keeping everything alive: the magneto stator. It’s buried behind a side cover, soaked in oil, and it almost never gets any love—until your battery dies on a ride, your lights flicker, or the engine refuses to spark.

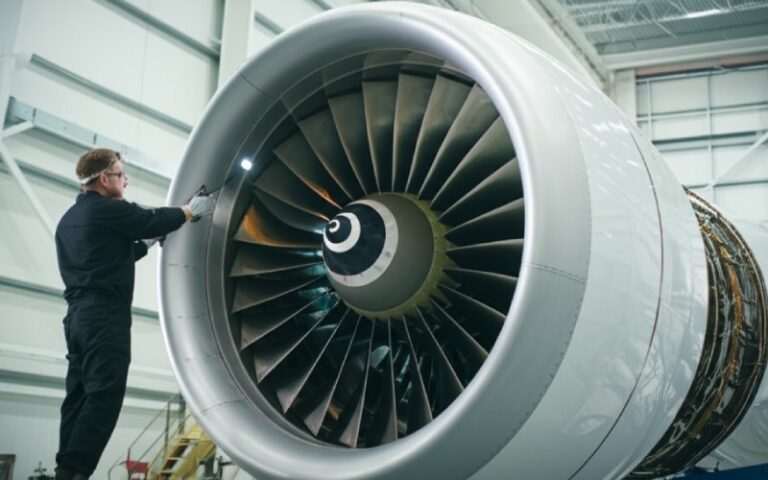
At its core, a magneto stator is just copper wire, iron, and magnets. But together, they pull off a neat trick: turning spinning metal into clean, usable electrical power without needing a battery to start with. That’s why magnetos are still used in everything from chainsaws to aircraft engines.


  • In this guide, you’ll learn:
    • What a magneto stator actually is (and how it differs from “just a stator” or an alternator)
    • The step-by-step physics of how spinning magnets become electrical power
    • The main parts inside a magneto stator and what each does
    • How it fits into your ignition and charging system
    • Common failure symptoms and simple ways to test one
    • Practical tips if you’re upgrading or replacing a stator

1. Magneto vs. Stator vs. Alternator – Clearing Up the Names

This is where a lot of people (and a lot of blogs) get tangled up, so let’s untangle it right away.

stator is simply the stationary part of a machine—usually the ring of iron and copper windings that never moves. The rotating part in the middle is called the rotor or flywheel. In motorcycles, the stator plus a spinning magnet is what generates AC power for your lights and battery.

magneto is a type of alternator that uses permanent magnets on the rotor instead of an energized coil. It generates its own AC electricity as the engine spins, which can be used directly for ignition and/or charging—no external battery needed to excite the field.

Put those together and you get a magneto stator: the stator assembly used inside a magneto-style alternator, built around permanent magnets and copper windings.


  • Quick definitions you can keep in your head:
    • Stator – the fixed ring of coils; it doesn’t say how it’s powered.
    • Magneto – a self-contained generator that uses permanent magnets to make AC power.
    • Magneto stator – the stator coils specially designed to work with those permanent magnets.
    • Automotive alternator – similar principle, but usually uses an electromagnet rotor and brushes so the output can be tightly voltage-regulated.

2. Big Picture: What a Magneto Stator Does for the Engine

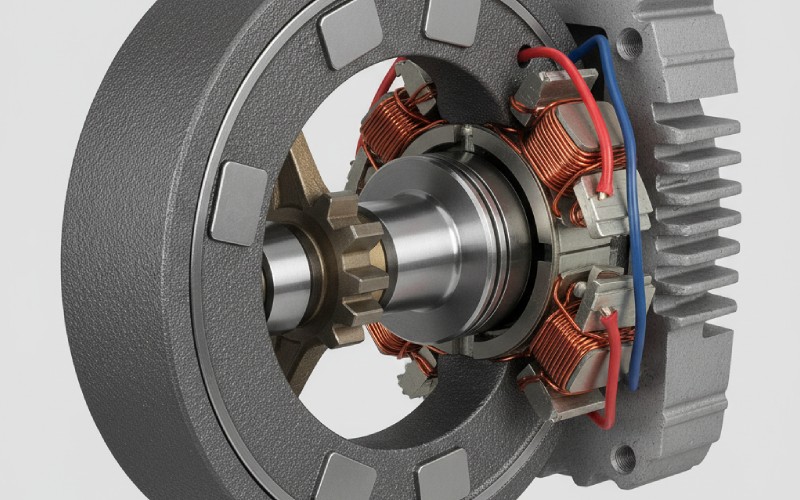
Inside your engine case, the crankshaft spins a flywheel that has powerful permanent magnets embedded around its rim. The magneto stator sits just inside that flywheel, lined with copper coils. As the flywheel rotates, its magnetic field sweeps across those coils and induces an alternating voltage in them. That’s pure electromagnetic induction, the same basic principle behind any alternator or generator.

Depending on the design, that AC power is then:

  • Sent directly to a CDI or ignition module to fire the spark plug
  • Routed through a regulator/rectifier to charge the battery and feed lights and electronics
  • Split into separate “lighting coils” and “ignition coils” on the same stator plate

In other words, the magneto stator is the engine’s built-in power plant—no stator, no spark, no charging, no fun.


  • On most bikes or small engines, the magneto stator is responsible for:
    • Generating AC power as soon as the crankshaft starts turning
    • Feeding energy to the ignition system so the plug can fire
    • Recharging the battery via a rectifier/regulator (in battery-equipped systems)
    • Powering lighting and accessories, especially at higher RPMs

Magneto stator on workbench

3. The Physics in Slow Motion: One Revolution of the Crank

Let’s slow time down and watch a single crankshaft revolution through the eyes of the stator.

The flywheel passes by with alternating north and south magnetic poles embedded in it. As each pole sweeps past a stator tooth wrapped in copper wire, the magnetic flux through that coil changes. Faraday’s Law says that any change in magnetic flux through a conductor induces an electromotive force (voltage) in it.

When the magnet approaches, flux through the coil rises and a current is pushed one way. As it moves away and the opposite pole comes by, the flux falls and reverses, so the current flows the other way. Do this many times per second and you’ve essentially built a permanent-magnet alternator, right inside the engine case.


  • During one engine revolution, each stator coil experiences:
    • Increasing magnetic field as a magnet pole approaches → voltage rises in one direction
    • Peak alignment between magnet pole and coil → maximum induced voltage
    • Decreasing field as the magnet moves away → voltage drops back toward zero
    • Opposite pole passing → flux reverses, current reverses, giving the AC waveform
    • Repeat for every pole and coil, producing multi-phase AC power

4. What’s Actually Inside a Magneto Stator?

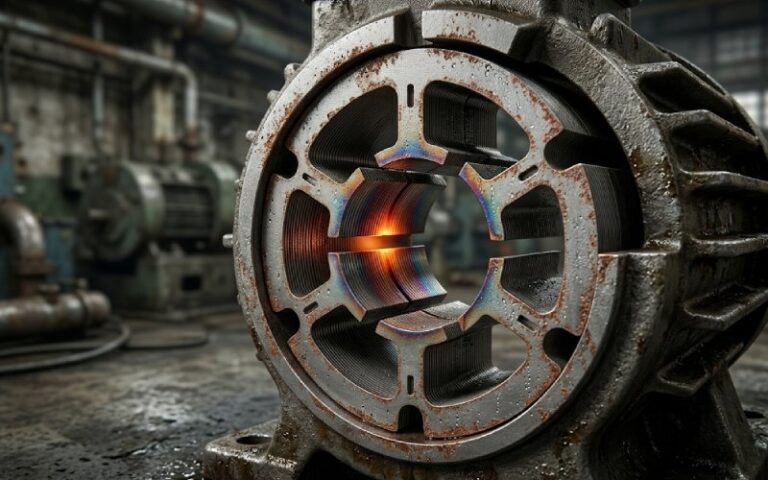
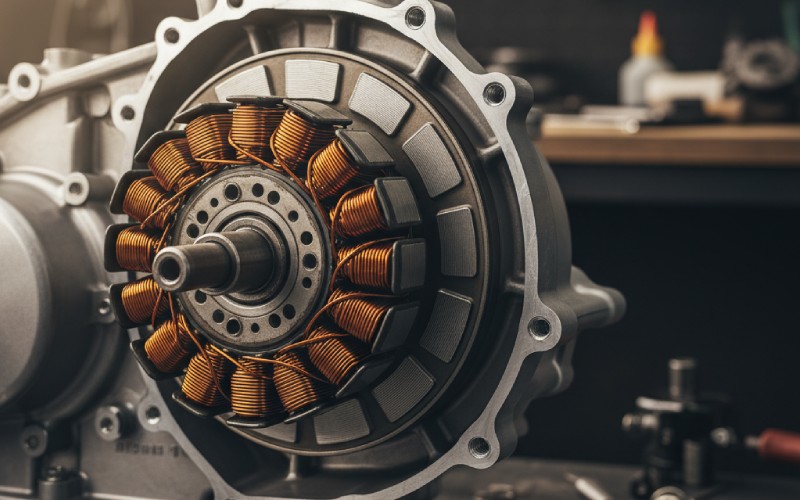
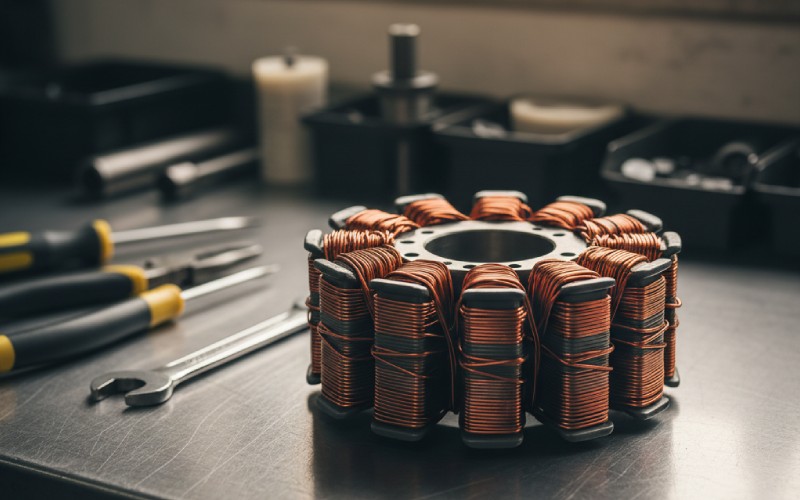
If you pull the side cover off a typical motorcycle or ATV engine and remove the flywheel, you’ll see a circular assembly dotted with copper coils. That’s your magneto stator.

Inside, the construction is surprisingly elegant:

The core is usually made from thin, laminated sheets of steel stacked together. Laminations cut down on eddy current losses and heating. Around each tooth of that core, enameled copper wire is tightly wound to form a coil. Those coils are then wired together in a specific pattern (single-phase, three-phase, split for lighting vs. ignition, etc.). The entire assembly is bolted solidly to the engine case so it never moves.


  • Typical components of a magneto stator:
    • Outer frame / mounting plate – holds everything in position relative to the flywheel
    • Laminated iron core – provides a low-reluctance path for the magnetic field
    • Copper windings – multiple coils that actually generate electricity
    • Pickup / trigger coil (on some systems) – sends timing pulses to the CDI or ECU
    • Insulation and potting materials – protect the windings from vibration, oil, and heat
    • Output leads and connectors – carry the AC power out to the rectifier and ignition boxes

5. Magneto, Simple Stator, and Car-Style Alternator: Side-by-Side

Here’s a quick comparison you can skim when you’re not sure what someone means by “stator” or “magneto” in a forum post:

System typeRotor field sourceStator’s roleNeeds battery to make power?Typical use cases
Magneto alternatorPermanent magnets in rotorStator coils generate AC directlyNo – self-excitingMotorcycles, small engines, aircraft ignition
Car-style alternatorElectromagnet rotor coilStator coils generate AC from rotor fieldYes – rotor needs DCCars, trucks, large road vehicles
“Just a stator”Depends on the systemGeneric name for stationary windingsVariesAny motor/generator with a stationary winding

The magneto stator we’re talking about is that first column: permanent magnets, self-exciting, and very happy living inside engines that might not even have a battery.


  • Why manufacturers love magneto stators for small engines:
    • No brushes or slip rings → less wear and maintenance
    • No separate field power → simple, robust, and cheap to build
    • Still works if the battery is flat (or missing entirely)
    • Compact design that fits neatly inside an engine side cover

6. Different Flavors of Magneto Stators

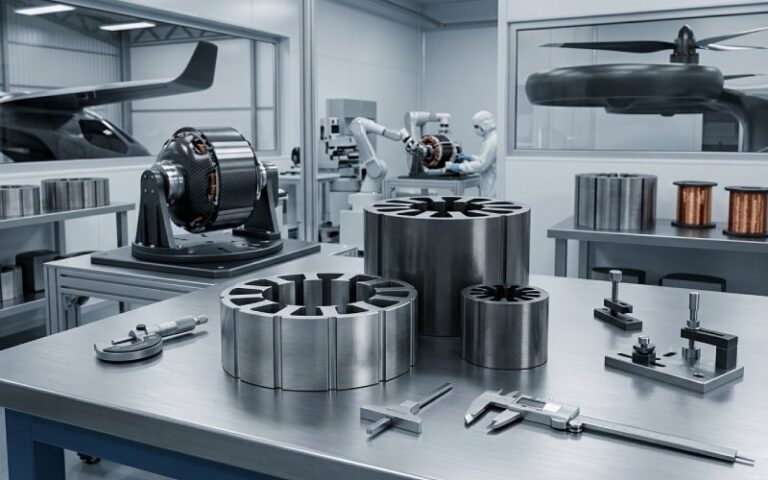
Not all magneto stators are created equal. If you line up three stators from different bikes, you’ll see differences in size, number of poles, and wiring. Those are all design choices aimed at balancing cost, output, and smoothness.

Common variations include:

  • Number of poles: More poles generally mean smoother output and higher power at lower RPM, but more complexity and cost.
  • Single-phase vs. three-phase: Many older or small bikes use single-phase stators; modern or higher-output systems often use three-phase for better efficiency and smoother charging.
  • Dedicated ignition vs. lighting coils: Some stators have separate windings for ignition and for charging/lighting, allowing ignition to remain independent of battery or lighting failures.

  • What changes when you go to a higher-output or three-phase stator?
    • More copper and more poles → more electrical power, especially at mid/high RPM
    • Often requires a compatible regulator/rectifier to handle the extra current
    • Smoother charging current and less flicker in lighting
    • Slightly more cogging torque (that “notchy” feel at very low RPM) if not carefully designed

7. Where the Magneto Stator Fits in the Ignition & Charging System

On a typical motorcycle with a magneto stator, you can think of the charging and ignition systems as branches growing off the same root—the stator.

As the stator generates AC, part of that energy is sent through a regulator/rectifier, which converts the AC to DC and clamps the voltage to a safe level for the battery and electronics. Another portion (or dedicated set of coils) feeds the CDI/ignition module, which uses the stator’s pulses plus a trigger coil to time and fire the spark plug.

This is why a sick stator can cause both charging problems and misfires or no-start conditions.


  • Common signal paths from a magneto stator:
    • 3 yellow (or white) wires – three-phase AC going to the regulator/rectifier
    • 1–2 dedicated wires – ignition power coil feeding the CDI or ECU
    • Pickup / trigger wire – tiny coil giving timing pulses synced to crank position
    • Ground reference – usually via the engine case or a dedicated ground lead

8. How Magneto Stator Design Affects Performance

Engineers tweaking a magneto stator juggle several factors:

They choose magnet strengthnumber of poleswire gauge, and core geometry to hit a target power curve. A stator meant for an enduro bike might prioritize charging at low to mid RPM for trail speeds, while a sportbike stator might lean toward high-RPM output to feed powerful lights and electronics.

Laminations reduce eddy losses, while carefully chosen slot shapes and pole counts help minimize cogging torque and vibration, especially in permanent-magnet machines.


  • Design trade-offs you’ll see in the real world:
    • Higher output stators often run hotter and may stress connectors or the regulator if the rest of the system isn’t upgraded.
    • More poles / stronger magnets can improve low-RPM output but increase mechanical drag and cogging.
    • Cheaper stators may skimp on copper fill, insulation quality, or varnish, making them more prone to burnout or shorts.
    • OEM units tend to be very reliable but not always optimized for accessory-heavy bikes (extra lights, heated gear, etc.).

9. Symptoms of a Failing Magneto Stator

Because the magneto stator sits in a hot, oily, vibrating environment, it can and does fail—usually from insulation breakdown, overheating, or physical damage.

When it starts to go, you’ll often notice a mix of electrical gremlins rather than just one clean failure mode. Stator problems are frequently confused with bad batteries or regulators, so it helps to know the tell-tale signs.


  • Classic signs your magneto stator might be failing:
    • Battery that keeps going flat even with a new replacement
    • Dim, yellow, or flickering lights that get worse at low RPM
    • Misfires, weak spark, or engine that dies as it warms up
    • Burnt smell or visible dark/burned coils when the stator cover is removed
    • AC output that doesn’t rise with RPM when measured at the stator wires

10. Simple Ways to Test a Magneto Stator

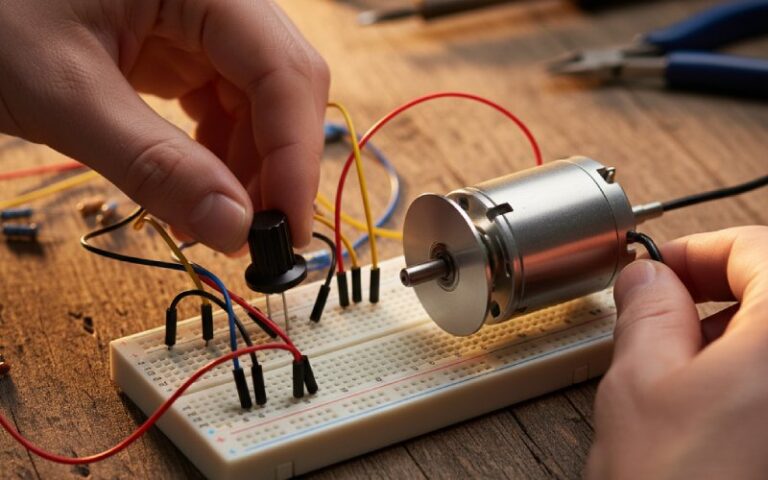
The good news: you can diagnose a magneto stator with a cheap multimeter and a bit of patience.

The basic tests fall into two buckets—static checks with the engine off and dynamic checks with it running. For both, refer to your service manual for exact resistance and voltage specs for your engine, but the principles are widely similar.


  • Typical DIY testing steps (high-level):
    • Resistance check between phases – Coils should show low, equal resistance (often well under 1 Ω) between each pair of stator wires. Big differences or open/short readings suggest damage.
    • Check for shorts to ground – Any continuity from a stator output wire to the engine case usually means a failed winding.
    • AC voltage test (engine running) – With the stator disconnected from the regulator, measure AC between each pair of wires. Voltage should increase smoothly with RPM and be roughly equal across all pairs.
    • Visual inspection – Look for dark, charred windings, melted insulation, or damaged leads.

Cutaway view of magneto stator system

11. Caring for and Upgrading a Magneto Stator

A healthy magneto stator will often last the life of the engine, but certain habits and mods can shorten or extend its life.

Stators hate excess heat and overloaded systems. If you’ve added big auxiliary lights, heated grips, phone chargers, and more, you’ve likely pushed the charging system closer to its limit. Pair that with a tired regulator/rectifier or poor airflow, and you can cook the stator windings over time.


  • Practical tips for long stator life (and smarter upgrades):
    • When adding electrical accessories, add up their wattage and compare with your bike’s charging output; leave headroom.
    • Replace aging or suspect regulator/rectifiers—an over-voltage or constantly overloaded regulator can burn out a stator.
    • Use quality replacement stators with good-grade copper and insulation; bargain units often fail early.
    • Keep connectors clean and tight; high resistance in plugs or grounds creates heat and voltage drops.
    • If installing a high-output stator, make sure your wiring harness, fuses, and regulator are rated for the extra current.

12. Wrapping It Up

A magneto stator isn’t magic—it’s a carefully arranged ring of iron and copper living in the magnetic field of your flywheel. As that field swings past, it pushes electrons around in the coils, creating AC power that keeps your ignition sparking, your battery topped up, and your lights cutting through the dark.

Once you understand how it works and how it fits into the bigger charging and ignition picture, diagnosing problems (or planning upgrades) becomes a lot less mysterious. Next time you thumb the starter and everything comes to life, you’ll know exactly which hidden component is doing the heavy lifting.

Share your love
Charlie
Charlie

Cheney is a dedicated Senior Application Engineer at Sino, with a strong passion for precision manufacturing. He holds a background in Mechanical Engineering and possesses extensive hands-on manufacturing experience. At Sino, Cheney focuses on optimizing lamination stack manufacturing processes and applying innovative techniques to achieve high-quality lamination stack products.

New Product Brochure

Please enter your email address below and we will send you the latest brochure!

en_USEnglish

Let Sino's Lamination Stacks Empower Your Project!

To speed up your project, you can label Lamination Stacks with details such as tolerance, material, surface finish, whether or not oxidized insulation is required, quantity, and more.