Let Sino's Lamination Stacks Empower Your Project!
To speed up your project, you can label Lamination Stacks with details such as tolerance, material, surface finish, whether or not oxidized insulation is required, quantity, and more.
A single-phase motor is the main worker in your home and shop. It runs many things, from your furnace fan to your drill press. But the wires can look hard to understand. This guide is made to help you. We will teach you the safe way to connect your single-phase electric motor. You will find out what the wires are for and how to connect them correctly. After you read this article, you will feel sure of yourself. You will be able to finish your motor wiring job safely. This will save you time and stop you from breaking your new motor.
A single-phase motor is a kind of electric motor. It uses single-phase power. This is the type of power you get in your home. Your wall outlets give you single-phase power. Because of this, this motor is used a lot in tools and machines you use every day. Big factory motors often need special three-phase power. This motor is different. It is made to be used easily and right away.
You can see a single-phase motor in many things. They are in fans, pumps, and refrigerators. They are also in air conditioners and power tools. If a machine has a motor and you plug it into a normal wall outlet, it is very likely a single-phase motor. The motor has a simple build. This makes it something you can count on and is simple to use. Knowing about this motor is an important thing to know for any person who owns a home or works on projects with machines. This simple electric motor is made to do a lot of hard work.
Working with electricity can hurt you badly. The number one rule is to always think about safety first. Before you touch any wires on the motor, you need to be completely sure the power is turned off. You do this by turning off the breaker at your electrical panel. You should also use a voltage tester. This will help you check a second time that no power is in the wires you are about to touch.
Even a little mistake can cause you to get hurt very badly. It could also break the motor. Do not guess that the power is off. You must always check for yourself. Work in a place that is dry and has a lot of light. Water and electricity are a bad mix. It is also smart to wear safety glasses to keep your eyes safe. It is much better to take a little more time to be safe than to go too fast and have an accident. A safe motor setup is a good motor setup. What you want is to make your motor work, not to get an electric shock from the power supply.
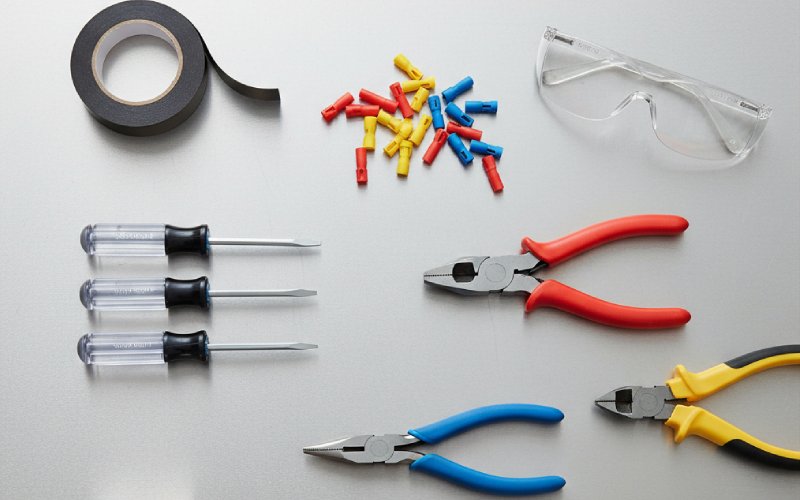
Having the right tools makes any job easier and safer. To connect your motor, you do not need a lot of special things. You likely have most of these tools in your toolbox already. Getting them ready before you start will help the job go well.
Here is a list of tools you will probably need:
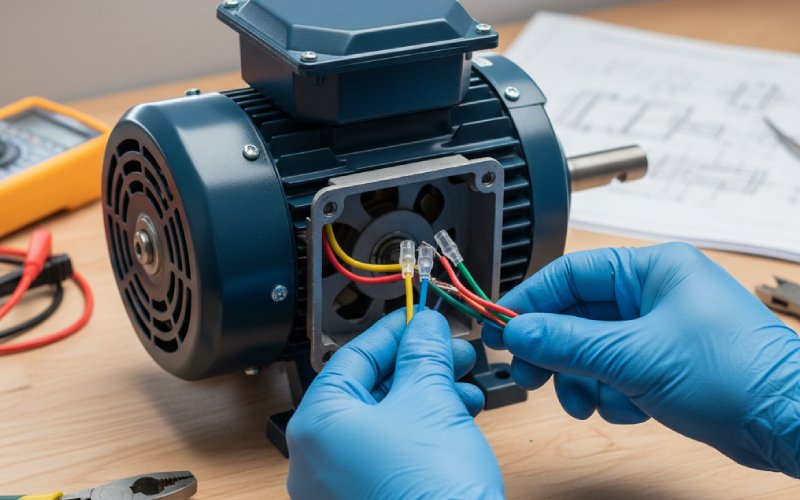
Almost every motor has a small metal plate on it. This is called a nameplate. This nameplate tells you many things. The most important part for connecting the motor is the wiring diagram. This diagram is your guide. It shows you just what to do to connect the motor for different voltages. It also shows how to connect it for different spin directions. It might look hard to read at first, but it is easier than you think.
The diagram shows the wires inside the motor. They often have labels with numbers like T1, T2, T3, and T4. It will also show where to connect the wires that bring the power. These are often labeled L1 (Line 1) and L2 (Line 2 or Neutral). The diagram will show you which motor wires to join together and which ones to connect to the power supply. For example, a diagram might show that for low voltage, you should connect T1 and T3 to L1, and T2 and T4 to L2. Following this diagram is the most important part of making the motor run right.
| Voltage | Connect L1 To | Connect L2 To | Wires to Join Together |
|---|---|---|---|
| Low Voltage (120V) | T1 and T8 | T4 and T5 | T2, T3, T6, T7 |
| High Voltage (240V) | T1 | T8 | T2, T3, T4, T5, T6, T7 |
Note: This is only an example. You must always follow the diagram on your own motor.
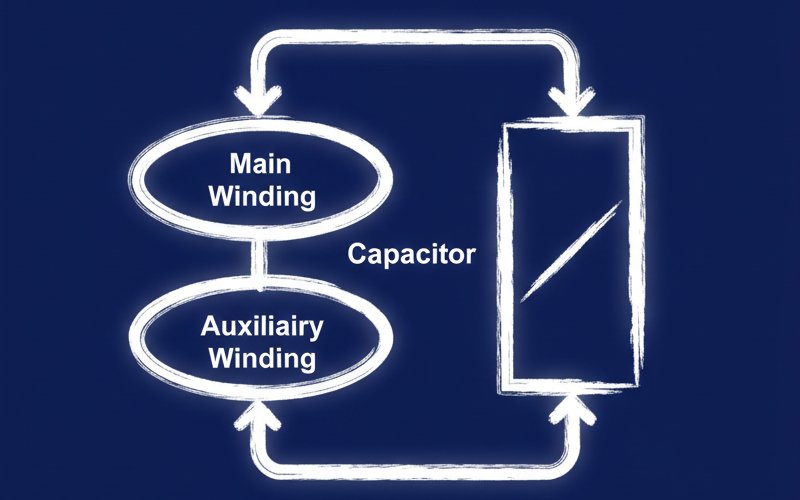
If you look at your single-phase motor, you might see a round or oval can on its side. This is the capacitor. A single-phase motor has a problem. It cannot begin to turn by itself. It needs a small push to get moving. A single-phase power supply makes a magnetic field that only pulls and pushes back and forth. This is not enough to make the motor shaft turn. The motor needs a spinning magnetic field to get past its own inertia, which is its resistance to starting.
This is where the capacitor helps. The capacitor is connected to a special group of wires inside the motor. These are called the start winding. The capacitor changes the timing of the electric power in this winding. This makes a second electrical phase. This second phase makes a second magnetic field that is not happening at the same time as the first one. The two fields work together. They make the spinning magnetic field that the motor needs to start. After the motor is at full speed, a switch inside the motor usually shuts off the capacitor and the start winding. The main winding has enough power to keep the motor working.
No, there are a few different kinds of single-phase motors. They all use one phase of power, but they start in different ways. The kinds you will see most often are split-phase motors and capacitor-start motors. A split-phase motor does not have a capacitor. It uses a different type of start winding to make the starting push. You usually find these motors on smaller machines.
A capacitor-start motor, which we just talked about, uses a capacitor to get a strong starting push. This gives the motor more starting power. These motors are very good for machines that are hard to get started, like air compressors or pumps. Some motors even use one capacitor to start and another one to run. This helps the motor use power in a better way. The good news is that it does not matter what kind of single-phase motor you have. The rules for connecting are the same: always follow the wiring diagram on the motor.
Connecting the motor is a set of easy steps. Follow these steps with care to make sure the setup is safe and right. Do not forget, the power supply must be off before you start.
Sometimes, you need your motor to turn the other way. For example, a fan motor could be pushing air in the wrong direction. The good news is that most single-phase motors can spin both ways. Changing the motor’s direction is usually just a simple change to the wires. Again, the answer is on the motor’s wiring diagram.
The diagram will show you which wires to switch to make the motor spin the other way. This usually means you switch the connections of the start winding. For example, a diagram might tell you: “To reverse spin, switch T5 and T8.” This means you would take T5 and T8 apart. Then you would reconnect them in each other’s place. It is an easy change, but it changes in a big way how the magnetic field spins at the start. This changes the direction the motor turns. Always turn off the power before you make this change.
This is one of the problems that happen a lot with a single-phase motor. You turn on the power, and the motor makes a humming sound, but the shaft does not turn. This almost always means there is a problem with the parts that help it start. The motor is getting power to its main winding (this is the hum you hear). But it is not getting the “push” it needs to begin turning.
The first thing you should check is the capacitor. The capacitor can get old and stop working. If the capacitor is broken, the start winding will not get the power it needs to make the starting field. You can test a capacitor with a special tool. Or, sometimes you can see things that show it is broken, like if it is puffed up or leaking. Putting in a new capacitor is usually an easy and cheap fix that will make your motor work again. If the capacitor is good, the problem might be the starting switch inside the motor, which is harder to fix.
You have connected all the wires and put the cover on the box. You are almost ready to turn the power on again. But first, do a few last checks to be sure everything is just right. This last check can stop problems from happening.
After you have done these checks, you can go and turn the breaker on. Your motor should start right up and run well.