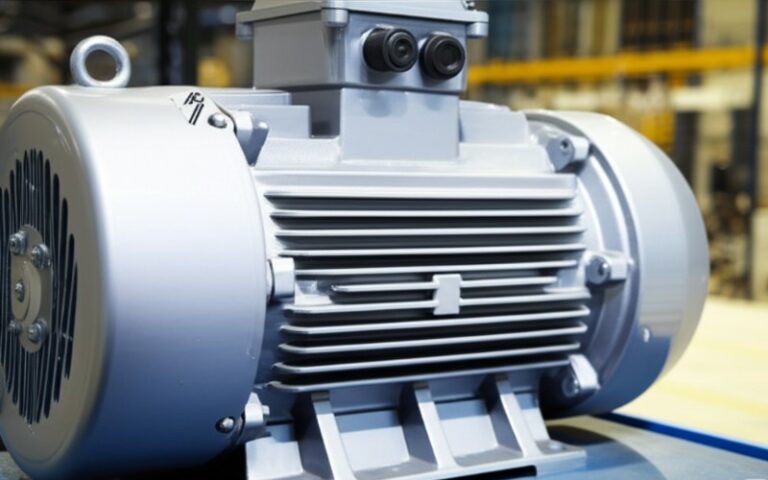
Let Sino's Lamination Stacks Empower Your Project!
To speed up your project, you can label Lamination Stacks with details such as tolerance, material, surface finish, whether or not oxidized insulation is required, quantity, and more.
If you want edge chipping to disappear, you don’t start with the truck or the ship. You start with how the laminations behave when the pallet hits a pothole. Treat the stack as a precision component, lock it so it cannot move relative to itself, and stop any hard, sharp interface from ever touching a bare edge. Do those three things properly and transit damage drops to near zero, even when the route is not friendly.
You already know the theory: burrs and damaged edges raise local flux density, create interlaminar shorts, and add loss. Several studies on transformer cores and electrical steel show that edge burrs and mechanical damage around the laminations can measurably increase core loss and hot spots in service.
Now combine that with what happens during transport. Laminations are thin, hard and stiff. Under vibration and shock, the stack behaves almost like a bundle of razor blades, especially where there are burrs or very sharp edges from punching or cutting. If the stack is not compressed properly, each plate wants to slide a little. Not much, just fractions of a millimetre, but several thousand times during the trip. Every tiny relative movement is a chance for:
Even small surface defects on laminations caused by poor handling and packaging are significant; suppliers report that surface damage in transit can push core losses up by as much as 10–15%, which is not a cosmetic issue anymore.
Most “standard” packaging instructions protect faces and flat areas. The failure usually hides at the interface between the lamination edge and something harder than it. That’s the interface you design around.
Forget “put laminations on pallet, strap, wrap, ship”.
The practical target is simpler and stricter:
Turn each lamination stack into a single rigid, corrosion-safe module that:
If you package with that test in mind rather than “meet spec X.Y”, you automatically start designing different details: stronger edge protection, fewer voids, better blocking, and actually useful compression rather than cosmetic banding.
Most general protective packaging articles talk about protecting cartons or machine frames. They often highlight edge and corner protectors as a way to carry strap tension and distribute load along the edges of palletised goods. The principle is the same here but much less forgiving, because your “product” is a thin magnetic stack, not a box of something.
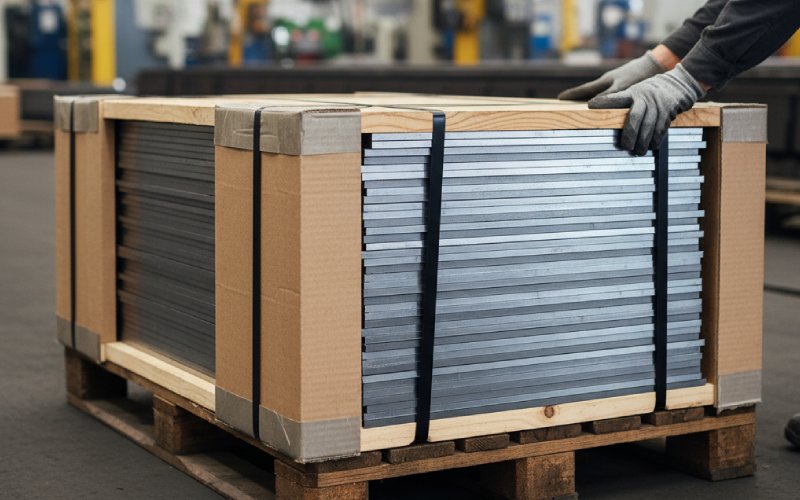
Standard L-shaped edgeboards are useful as a starting point. They give you:
For laminations, treat the protector itself as a component with tolerances, not a generic commodity. Three details usually make or break performance:
First, leg length. If the lamination stack height is 300 mm and you put on a 50 mm leg protector, the strap will dig into the laminations above and below the protector. For sharp electrical steel edges, you typically want the leg to cover at least 80–90% of the stack height so any strap line of action always passes through board, not steel.
Second, material stiffness and crush behaviour. Recycled board is fine if compression is moderate; for heavy stacks above, say, 800–1000 kg per pallet, plastic or laminated board with high compressive strength behaves better under a strap that will sit there for weeks or months. If the protector crushes, the strap loosens. Once the strap loosens, the stack starts to rattle. After that, you are relying on luck.
Third, corner fit. A loose corner that rocks or that has a big radius leaves gaps. Under vibration, the lamination edge can walk into that gap and start micro-chipping against the protector or against the strap behind it. It’s not a big design exercise, but actually test fit protectors on a real stack and store that combination as a controlled item: lamination geometry, stack height range, protector size, strap diameter, and target tension.
Edges do not live only on the long sides. Square or EI stacks are often dropped on their short ends or pushed sideways against other pallets.
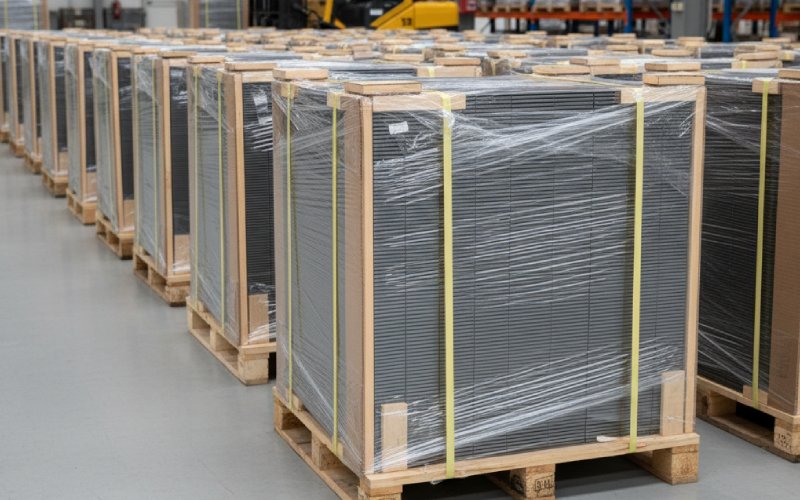
Closed end caps – timber, plywood or dense board, shaped to match the lamination – remove line contacts where the edge would otherwise hit a pallet deckboard, a neighbour stack, or the truck wall. Many lamination exporters now routinely mount stacks on treated wooden pallets, wrap them with rust-prevention material and add alignment supports at the top and bottom so the bundle behaves as a solid unit during transport.
Between layers, thin interleaves (kraft, PE, or VCI paper) slightly increase friction and reduce bare steel-to-steel scuffing when there is inevitable small movement. They are not magic, but they give you a small extra margin before marks appear, especially at the corners where cut-outs and step joints concentrate stress.
If the stack can “breathe” under vibration, the edges will grind. It is that straightforward and also slightly messy, because you do need some compression but not so much that laminations deform or insulation coating is damaged.
Field experience and supplier guidance point to a few consistent practices for export laminations: heavy-duty pallets, rust-protected packing, plastic wrap sealing, and carefully aligned stacking so the mass is compact and cannot tilt. The hidden element is maintained compression.
A practical way to think about it inside your plant:
Strapping is not there “to keep things together”. It is there to maintain a defined compression in the pack for the entire logistics chain.
That means three simple but often ignored actions.
Use enough straps so the compression field is reasonably uniform. A single pair of straps in the centre of a long stack means the middle is compressed and the ends are relatively free to vibrate and chip. Two or three pairs spaced along the length are usually needed on heavy stacks, always placed over edge protectors.
Control strap tension. If you do not specify and measure tension, you do not have a process, just a habit. Tension targets depend on strap type and protector strength, but once you choose a combination, treat the tension setting on your tool and a quick verification check as part of the quality gate.
Lock the compression mechanically. Steel straps can creep slightly; PET straps creep more. Use corner blocks or top frames so that if the strap relaxes a little, the geometry still blocks the pack from expanding. It is almost like preloading a bolted joint with a hard washer.
Stretch wrapping, by itself, is not compression. It is containment and surface protection. Good to have, not enough alone.
Your laminations might be perfect, your internal packaging neat, and the damage still appears. Often the root cause sits one level lower, in the pallet system.
Suppliers that specialise in laminations for export consistently highlight heavy-duty pallets, full contact support, and strict control of stack alignment as keys to avoiding damage in transit.
A useful mental checklist when you stand in front of a loaded pallet:
The stack must not overhang the pallet deck. Any overhang is a leverage arm just waiting for a side impact.
The deck beneath the stack must be continuous enough that no individual lamination edge sits over a gap between deckboards. If it does, a fork tine or bump will flex the deck and turn that gap into a pinch point.
All stacks on the pallet should be locked together as a group, or strongly isolated. Two big stacks “floating” on the same pallet can hammer each other during a rough journey.
Finally, design for forklifts and cranes, not just for the static pallet. Think about where fork tines will enter, how wide they are, what happens if the driver approaches at an angle, and whether any tine can contact a bare lamination edge or a very thin board with little backup.
This part is less obvious. Moisture does not only cause rust; it also changes friction conditions in the pack. Slight corrosion at edges can create micro-wedges and high spots which then chip under vibration.
Manufacturers of electrical steel laminations note that laminations are highly susceptible to moisture-induced corrosion and physical damage during transit, and they explicitly link poor packaging to increased core loss, up to around 15% in severe cases.
The packaging answer is usually a combination of:
Treated, low-moisture pallets, so the water source is not under the stack. A corrosion-inhibiting inner wrap around the lamination stack (VCI paper or film is common). A reasonably tight outer wrap or shrink hood to keep bulk moisture and dirt off, with desiccant where humidity is high or transit is long.
When you design the wrap, treat it as part of the mechanical structure, not only a barrier. A properly shrunk hood gives a little extra stiffness and prevents stacks from separating horizontally if straps loosen.

Here is a compact diagnostic table that you can map to incoming inspection photos. Use it to adjust packaging based on the damage you actually see rather than on guesswork.
| Observed damage on arrival | Likely motion in transit | Probable packaging weak point | Packaging change that usually fixes it |
|---|---|---|---|
| Consistent micro-chipping along one long edge of the stack, near mid-height | Repeated rubbing against a strap or neighbouring stack | Strap line contacting bare lamination edges; edge protector too short or missing | Increase edge protector leg length to cover full stack height; add inner board between stacks; reposition straps |
| Corner chipping on top corners only, often on outer laminations | Top of stack flexing under strap tension and impact | No rigid top cap; strap bending edges downward at corners | Add timber or plywood top frame; keep straps over frame, not over bare laminations |
| Random chips at lower edges, matching pallet slat pattern | Edges hitting pallet deck or slat gaps during vertical shocks | Deckboard gaps under lamination edges; no bottom pad or cap | Add continuous bottom pad or board; review pallet design to remove edge overhangs and gaps |
| Localised heavy damage on one face of one stack only | Stack-to-stack impact on pallet or in truck | Multiple stacks not tied together or isolated; void between stacks | Block stacks tightly with timber; strap stacks together as a single module or separate with rigid dunnage |
| Chipping plus rust staining at edges | Micro-movement combined with moisture over long transit | Weak corrosion protection and low compression; damp pallets | Move to treated pallets; add VCI inner wrap and desiccant; increase strap tension and edge protection |
This table is obviously simplified; real life can combine patterns. But it gives you a structured starting point for “what exactly went wrong here?” discussions.
Most plants do not fail once. They fail intermittently, when the experienced person is away or when a rush order goes out. That means you treat packaging as a controlled process, not a last-minute improvisation.
Start with a packaging specification per lamination family, written as seriously as a process sheet. Include stack dimensions, maximum mass per pallet, protector type and size, strap type and count, target tension range, pallet design, and environmental controls. Suppliers serving demanding OEMs already work this way and explicitly list packaging design as a quality differentiator.
Then link that spec to a simple, visual packaging drawing. People remember pictures, not paragraphs.
Add two quick checks at dispatch:
One person signs off that the stack cannot move inside its packaging. Another confirms that no bare lamination edge is visible where it could touch floor, pallet, fork, strap or neighbouring cargo.
Lastly, keep a small log of complaints and incoming photos from customers. When you see the same damage pattern twice, change the packaging spec, not just the pallet on that day.
To make this more concrete, imagine three common scenarios and how packaging adjusts. The numbers are indicative and should be tuned to your materials and routes, but the structure is portable.
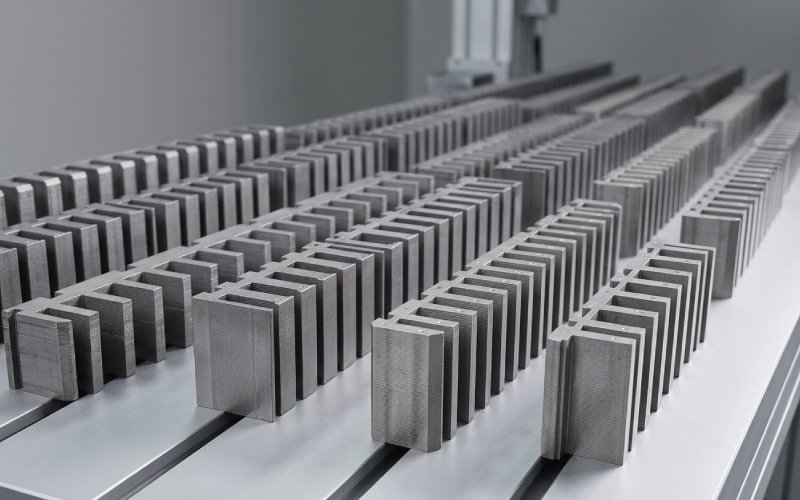
You have EI laminations around 0.27 mm thick, moderate size, shipping 300–400 kg per pallet over a few hundred kilometres by road.
In this case, a heavy but not extreme solution usually works. Each stack is built to a controlled height and mounted on a good-quality pallet with a continuous panel or thick board under the laminations. Two full-height cardboard edge protectors run the entire stack height on each long side, with a thinner protector on the short sides. A plywood top cap sits on the stack, slightly larger in plan than the laminations.
Two or three PET straps go over the long direction, always over the top cap and edge protectors, tensioned to your defined setting. Stretch wrap binds the stack to the pallet and reduces dust ingress. For this route and mass, desiccant and VCI might be optional if storage is dry and dwell time is short, but if your complaint history includes rust, you add them.
Edges remain invisible to the outside world. The customer unpacks and sees static stacks, not something that looks like it vibrated for hours.
Now the laminations are long, heavy segments built for large cores, with pallet weights above 1000 kg, going by sea and road over several weeks. This is where a more engineered design pays back quickly.
Each segment stack sits on a dedicated, treated pallet with wide deckboards or an added base plate to guarantee full support under the cut-outs and ends. Around the stack, you use high-strength laminated board or plastic edge protectors with legs almost equal to the stack height. Top and bottom timber frames clamp the stack so it behaves as a block, not as loose plates.
Steel or heavy PET straps, more of them, go over the frames and edge protectors. Strap positions match predefined locations in the drawing, and each strap is tensioned and locked consistently. Between stacks on the same pallet, there are solid timber spacers so that even a hard impact cannot make one stack hit another.
The entire assembly is wrapped first in VCI material, then in a heavier outer film or shrink hood, with desiccant inside. Label positions, lifting points, and “no fork here” zones are marked on the outer wrap. This all sounds like overkill until you compare the cost of one set of chipped core segments or rework at the destination.
For very low-loss designs, even slight edge marking is unwelcome. Some producers treat packaging as part of the loss budget.
Here you often see smaller, lighter stacks with more generous edge protection and more interleaving. Compression is applied with care, sometimes using torque-controlled bolts through top and bottom plates instead of, or in addition to, straps. The stack is almost treated like a finished core during transit, with cradle supports, shock indicators on the crate, and strictly controlled storage conditions.
It is easy to dismiss this as excessive. It is not, once you measure how much loss rises from damaged, burr-heavy edges and then price that against packaging.
There are many variations, product families, routes, and customers. But almost every low-damage packaging system for transformer laminations follows one simple rule:
Do not allow a bare lamination edge to see a hard contact under shock or vibration.
If your current packaging meets every internal checklist yet you still see chipped edges at the customer, walk to the shipping area and literally trace every possible contact path from lamination edge to the outside world: through the strap, through the protector, through the pallet, through neighbouring cargo. Somewhere along that path, there will be a short cut or a gap.
Close that gap, lock the stack, manage moisture, and your transit damage starts to look very different. Not because you added layers for the sake of it, but because you finally packaged the laminations the way they behave in the real world, not the way they look on a drawing.