Let Sino's Lamination Stacks Empower Your Project!
To speed up your project, you can label Lamination Stacks with details such as tolerance, material, surface finish, whether or not oxidized insulation is required, quantity, and more.
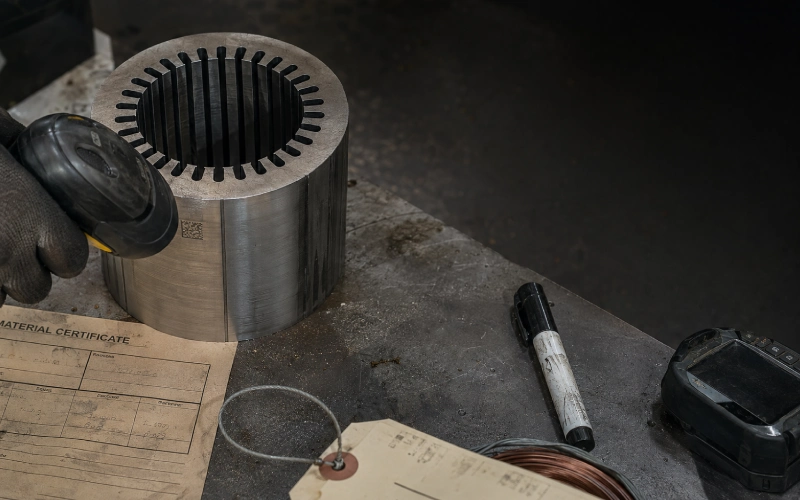
A lamination stack is only as good as the story it can tell about itself. Where did the steel come from? Which melt? Which coil, slit on which day, stamped on which press? When a motor fails in the field two years from now, someone will ask those questions. If you can’t answer them, the failure stops being a technical problem and becomes a liability problem.
That’s the whole reason traceability exists. Not paperwork for its own sake. A clean chain from the raw electrical steel coil all the way to the finished, welded or bonded core. And the two pieces that carry the most weight in that chain are the heat number and the machine-readable code you attach to the physical part.
Let me walk through how these fit together, where they fall apart, and what a workflow looks like when it’s built to survive a real shop floor.
Start with the steel. Electrical steel arrives as coil, and every coil traces back to a single melt at the mill. That melt has a heat number.
A heat number identifies a steel batch from a single melt. Every piece of finished steel product that comes from a heat must be traceable back to that heat number. The heat number is stamped, stencilled, marked, or tagged on the material at the mill, and the mill test certificate for that heat carries the same number. That certificate is where the real value sits — the chemical analysis, mechanical properties, and grade validation on the certificate apply to all material from that heat.
For a lamination stack, this matters more than for a lot of other parts. The magnetic properties, the coating chemistry, the stacking factor you get in the end — all of it inherits from the steel grade and its processing. If a batch of cores runs hot in service, the heat number is what lets you pull the mill cert, check the silicon content, and figure out whether the steel was the culprit or something downstream.
The certificate has a formal grammar too. The EN 10204 standard defines four certificate types: 2.1 (declaration of compliance), 2.2 (test report with non-specific results), 3.1 (inspection certificate with specific test results), and 3.2 (inspection certificate with third-party validation). For most serious work, a 3.1 certificate contains actual test results from the specific heat or batch of material being supplied, validated and signed by the manufacturer’s authorized inspection representative, and the test data is traceable to the specific heat number of the material in the delivery.
Here’s a decoding example so the format doesn’t feel like an abstraction. A heat number like ‘2412-EF2-0847-SA516’ might indicate: December 2024, Electric Furnace 2, the 847th heat, that grade of steel. Different mills use different schemes, but the logic is similar — date, furnace, sequence, grade.
This is the unglamorous part, and it’s where most systems quietly fail. Not in the design. In the handoffs.
There’s the sticky note failure — someone writes the heat number on a sticky note attached to the bundle, the note falls off, and no one can remember which cert goes with which stack. There’s the typo problem: a heat number like “H4827B” gets typed as “H4872B,” the systems don’t match, the cert can’t be found, and the material is effectively untraced. And the one that haunts stockrooms — off-cut orphans, where stock is cut for an order, the remnant goes back into the rack without its heat number recorded, and next time someone picks it, no one knows what it is.
None of these are dramatic on their own. But each of them sounds trivial in isolation — multiply them across thousands of stock lines and hundreds of deliveries per month, and you’ve got a serious compliance exposure.
The fix isn’t more discipline from tired people. It’s removing the moment where a human retypes something. The practical ERP requirement is that the certificate is generated from the same heat record that drives inventory, not re-keyed into a separate document system — re-keying is where mismatches happen. Same idea applies on the floor. Scan, don’t type.
If your stacks end up in vehicle traction motors, the heat number stops being good practice and becomes an audit requirement. Automotive quality systems built around IATF 16949 expect lot-level traceability that runs both directions — forward from a coil to every core it produced, and backward from a suspect core to the coil, heat, and process records that made it. The point is containment. When a defect surfaces, you want to bound the exposure to the exact heats and press runs involved, not recall six months of production because you can’t prove which cores were affected. The EN 10204 3.1 certificate feeds that requirement; it’s the document layer under the traceability chain, not a replacement for it.
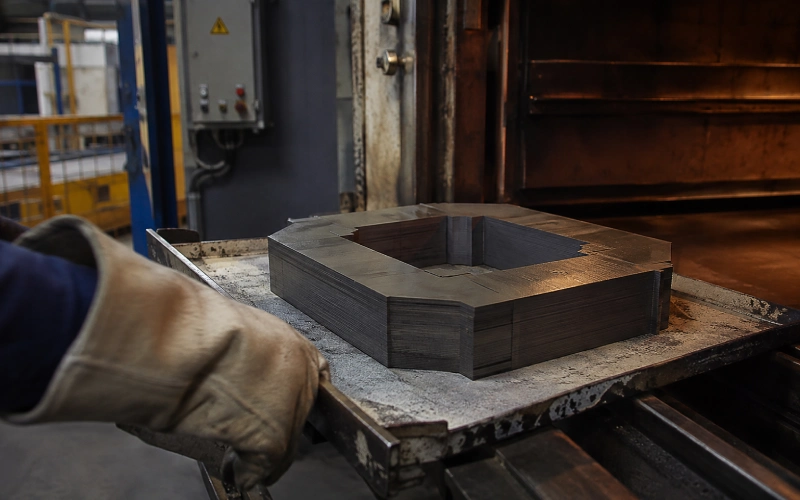
Once you’ve decided a code is going to carry the traceability link, you have to pick which kind. They’re not interchangeable, and the marketing around them tends to blur the differences.
The short version: 1D barcodes are simple and cheap but hold almost nothing. Traditional 1D barcodes store data in a single horizontal line, limiting capacity to about 20 characters, while QR codes store data in both dimensions, holding up to 4,296 characters, and QR codes also include error correction and can be scanned from any angle. Data Matrix codes are the workhorse for small metal parts — often used for engraving on small electronic components or automotive parts.
Here’s how I’d frame the trade-offs for a lamination stack specifically:
| Symbol type | Data capacity | Best fit for stacks | Weak spot |
|---|---|---|---|
| 1D barcode (e.g. Code 128) | ~20 characters | Simple serial or lot number on a routing traveler or bin tag | No error correction; useless if partly smudged; needs precise alignment |
| QR code | Up to ~4,296 characters | Codes meant for smartphone scanning, linking to a full digital record | Larger footprint than Data Matrix at the same data density |
| Data Matrix | High density, small footprint | Direct-marked serial on the stack or an individual lamination edge | Needs a decent surface finish and a good verifier to trust it |
A practical note on where you scan. For parts, QR codes are preferred when you need more data or smartphone scanning, while 1D barcodes may suffice for simple numeric serial numbers in automated environments. A lot of shops end up mixing methods, and that’s fine — a small identifier direct-marked on the part, a richer QR on the packaging or traveler.
One important distinction that gets lost: the code on the part usually should not hold all the data. It holds a key — a serial or lot ID — that points into your database, where the heat number, mill cert, press, coil, and inspection results all live. This keeps the physical mark small and lets the record grow over time.
Lamination stacks go through heat. That’s not optional. Bonded stacks get baked — the stack height is usually determined after the baking, i.e. a heating of the lamination stack to a temperature above the baking temperature of the hot-melt adhesive varnish. Annealed and coated stacks see much more. So your mark has to outlive the oven.
Adhesive labels are the obvious first instinct and often the wrong one for anything that gets hot. Conventional resin or even metal labels often suffer from discoloration, peeling, or loss of printed text and barcodes when exposed to heat. If you must label through a thermal process, purpose-built heat-resistant tags exist — made from metal or ceramic plates, with codes printed in heat-resistant ink and an optional overcoat, they can endure roughly 800°C to 1200°C while resisting friction and chemicals.
For a mark that never comes off, direct part marking wins. Laser marking is a high-precision process where a focused laser beam alters a material’s surface to create a permanent, scannable 2D barcode, and unlike inkjet or labels the data remains legible throughout the product’s lifecycle.
But here is the part that separates a marking specialist from someone who actually understands laminations, and it’s the constraint most guides skip entirely.
Electrical steel isn’t bare metal. Each sheet carries an insulating layer — an inorganic or organo-inorganic coating (the familiar C-5/C-6 families) or, for bonded stacks, a self-adhesive backlack layer. That coating exists to keep neighboring laminations electrically separated. That separation is the entire mechanism by which a laminated core suppresses eddy currents. Break the coating between sheets and you create an interlaminar short: current that should have been blocked now circulates, eddy-current loss climbs, and the core develops a local hot spot exactly where you welded it shut with a laser.
So there are really two limits when you direct-mark a lamination, and they answer to different failure modes:
The practical consequence: don’t mark where it electromagnetically hurts. Prefer marking the stack as an assembly, or a non-active edge, over scarring the face of a sheet that’s carrying flux. And if a program demands per-sheet marking, treat interlaminar resistance and core loss as acceptance criteria you actually measure on a sample — not assumptions you make because the code still scanned.
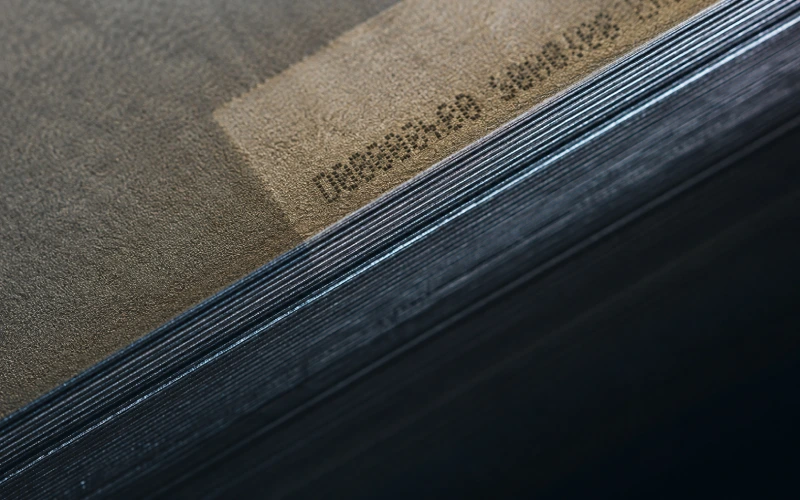
You usually can’t mark every sheet, and you don’t need to. Mark the coil/lot at incoming, carry that through the stamping and stacking records digitally, then apply a serial to the finished stack that ties back to the lot. That single decision sidesteps most of the depth-and-coating problem, because the physical mark lands on the assembled core rather than on hundreds of flux-carrying faces.
A code that scans once, on your bench, under good light, has proven almost nothing. A standard scan simply checks if the data can be read by that specific scanner at that exact moment. A phone scan is a useful functional check, not a certificate of compliance, and the overall symbol grade is determined by the lowest parameter grade, not an average.
That’s why verification is a separate step from scanning. Barcode verification is a stricter process used in regulated industries — a verifier uses controlled lighting and precision optics to grade the code against international standards such as ISO/IEC 15415 or AIM DPM, guaranteeing the code will be readable by any scanner throughout the product’s lifecycle. For direct part marks specifically, the general 2D standard isn’t quite enough — for direct part marks, ISO/IEC 29158 used with ISO/IEC 15415 can provide better correlation with scanning performance.
Two details that trip people up on metal parts:
Quiet zone. The blank margin around the code is load-bearing, not decorative. The quiet zone is a clear area free of all other markings that completely surrounds the code, and for a Data Matrix marked with a continuous finder pattern the quiet zone width should be at least the width of one data cell. Dotted or peened marks need more room — codes placed as a series of dots should have a quiet zone equal to at least four data cells.
The finder pattern. In a Data Matrix, the finder pattern consists of two orthogonal lines known as the “L” pattern, and it’s the key feature a reading algorithm uses to locate the code. If the L-side degrades in the oven, the whole code can become unreadable even if the data region looks fine.
Set the acceptance grade before you run the batch, not after. The required standard, lighting arrangement, grade, and reporting scope should all be agreed up front.
Here’s a workflow that ties heat number and code into one chain without a single retype:
The point of all this is that traceability stops being a folder someone has to maintain and becomes a byproduct of doing the work. The data flows one direction, gets captured at each handoff, and never depends on a person remembering to write something down.
Do I have to mark every individual lamination? Usually no, and often you shouldn’t. Mark the incoming coil/lot and carry it digitally through stamping, then apply a physical serial to the finished stack. Per-sheet marking risks exceeding the depth limit on thin steel and — more importantly — risks damaging the interlaminar coating on flux-carrying faces.
Will direct laser marking increase my core loss? It can, if you use the wrong process. Engraving or deep dot-peen can breach the insulation coating and short adjacent sheets, raising eddy-current loss and creating hot spots. A surface-annealing laser that changes color through controlled oxidation, placed on the assembled stack or a non-active edge, keeps interlaminar resistance largely intact. Verify it on a sample rather than assuming.
Which code should I use — QR or Data Matrix? For a small direct mark on metal, Data Matrix is generally the better fit because of its density and finder-pattern robustness. Use QR when you want smartphone scanning or a larger payload on packaging or a traveler. Reserve 1D barcodes for simple serials in automated line environments.
Will the code survive annealing or backlack baking? A direct annealing-laser mark will, because it’s a permanent surface change rather than an applied layer. Standard adhesive and printed labels tend to discolor or peel under heat. If you need a tag through a high-temperature step, use a purpose-built ceramic or metal heat-resistant tag.
What certificate type should I require from the steel supplier? For most motor and generator work, an EN 10204 Type 3.1 certificate is the working baseline — actual test results tied to the specific heat number of the delivered material. Type 3.2 adds independent third-party countersignature when a customer or regulation demands it, which is common for automotive and other high-reliability programs.
Isn’t a successful scan proof enough that my code is good? No. A scan proves one reader decoded it once under one set of conditions. Use a verifier graded against ISO/IEC 15415 (with 29158 for direct part marks) and set the acceptance grade before production.





 English
  German
  Spanish
  French
  Italian