Let Sino's Lamination Stacks Empower Your Project!
To speed up your project, you can label Lamination Stacks with details such as tolerance, material, surface finish, whether or not oxidized insulation is required, quantity, and more.
Lamination fanning usually happens when individual sheets are not controlled as a stack. The main causes are burr buildup, poor guide-pin clearance, uneven compression, sheet flatness variation, fixture wear, unstable transfer, and weak restraint before joining.
The most reliable fix is not one bigger clamp. It is a controlled stacking process:
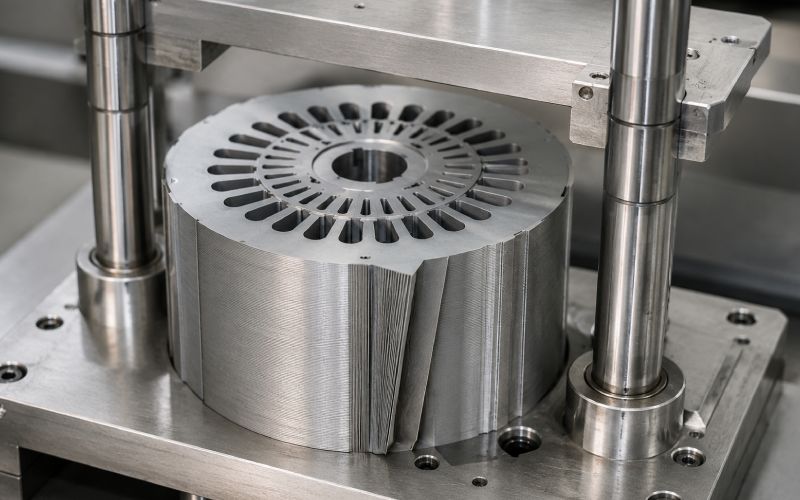
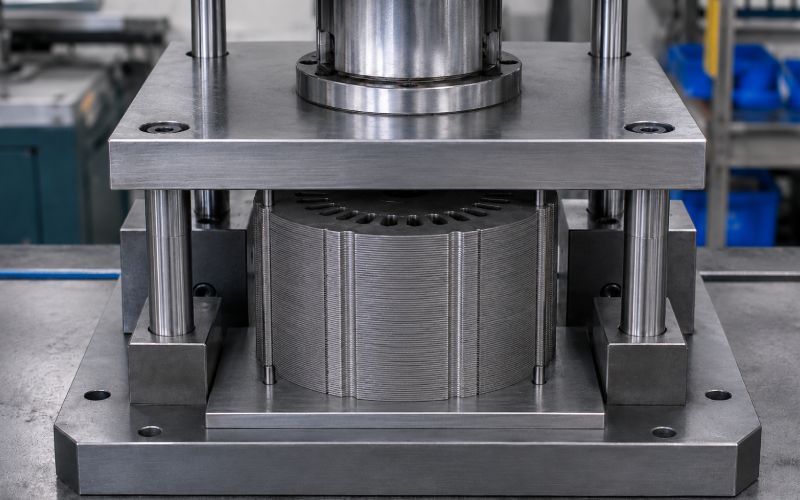
A good lamination stack should stay aligned when it leaves the fixture, not only while it is trapped inside it.
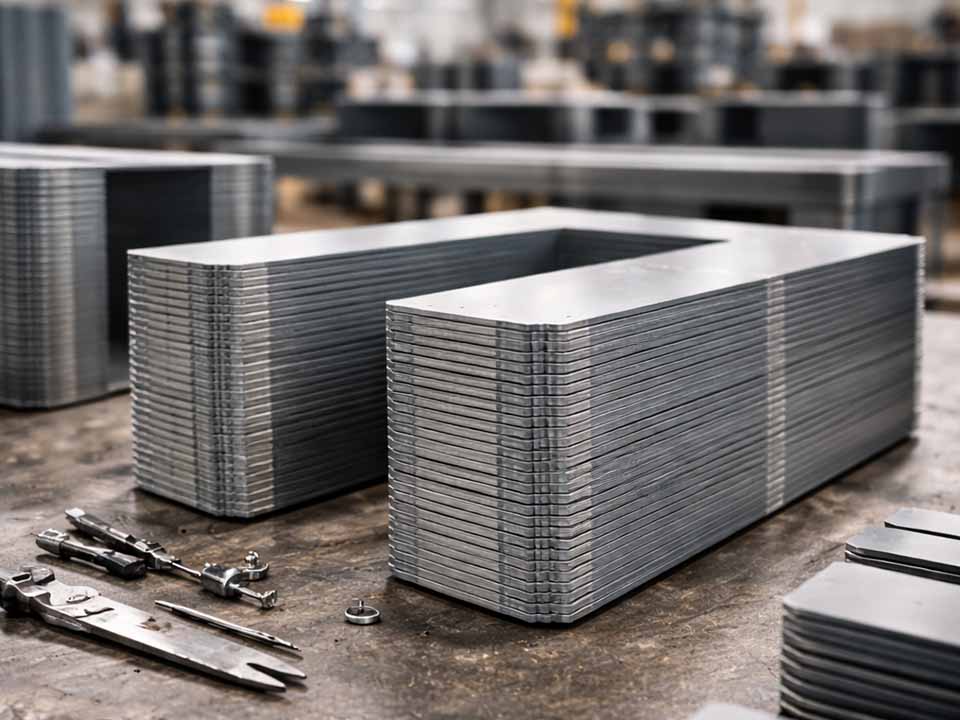
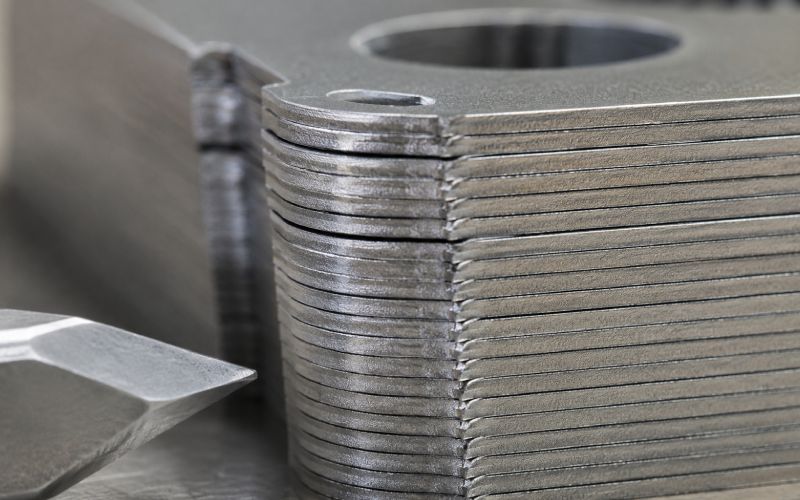
Lamination fanning is the spreading, opening, or uneven stepping of individual laminations in a stacked core.
It often appears at the outer edge, inner bore, slot area, tooth tips, or one side of the stack. Sometimes the defect is obvious. Sometimes it is only visible after the stack is compressed, released, welded, bonded, transported, or assembled into the next component.
In a clean lamination stack, the sheets behave like one controlled body. In a fanned stack, the sheets behave like loose plates with their own movement.
That is the real problem.
The stack may still contain the correct number of laminations. It may even meet stack height in one location. But if the layers are not seated and aligned consistently, the final part can have poor dimensional repeatability, unstable air-gap geometry, uneven joining quality, or damaged insulation between laminations.
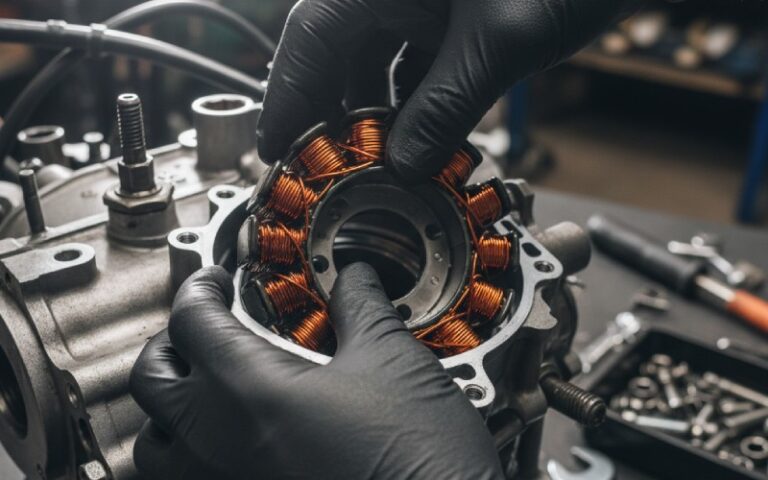
Lamination stacks are used because thin insulated sheets help control magnetic behavior and reduce unwanted current paths through the core. The stack also has to meet mechanical requirements: height, squareness, concentricity, slot alignment, bore accuracy, and fit with shafts, housings, windings, or mating assemblies.
When fanning or misalignment occurs, several defects can follow:
Fanning is not just a visual issue. It is often a sign that the stack is not stable enough for the next process.
A stack that looks straight only inside the fixture is not yet a stable stack.
| Cause | What You May See | Why It Creates Fanning | Best Control Method |
|---|---|---|---|
| Burr buildup | One edge opens or stack height varies | Burrs act like small wedges between sheets | Control stamping tool wear and inspect burr height |
| Mixed burr direction | Random gaps or unpredictable tilt | Sheets seat differently from layer to layer | Define and control lamination orientation |
| Poor guide-pin fit | Rotational drift or hole scratching | Too much clearance allows movement; too little causes binding | Validate pin clearance by drop behavior and post-release alignment |
| Fixture wear | Defect appears after many good batches | Worn guides no longer locate repeatably | Set fixture inspection intervals and wear limits |
| Uneven compression | One side seats before the other | Non-parallel force creates wedge-shaped stacks | Check platen parallelism and support surface flatness |
| Sheet flatness variation | Stack waves, rocks, or opens | Distorted sheets do not seat evenly | Inspect flatness before stacking |
| Debris or oil | Random local gaps | Particles or films change layer-to-layer contact | Clean laminations, pins, trays, and fixture pockets |
| High stacking speed | Top layers rotate or bounce | Impact and vibration let sheets walk | Reduce drop height and control feed motion |
| Weak transfer support | Stack fans after leaving fixture | Layers move before final joining or assembly | Use trays, sleeves, side supports, or temporary compression |
| Joining while unstable | Welded, bonded, or riveted stack locks in the defect | Misalignment is fixed into the final core | Join only while stack is fully restrained |
Many lamination stack defects begin before the first sheet touches the stacking fixture.
If the incoming laminations are inconsistent, the stacking process has to fight burrs, waviness, coating damage, dimensional variation, and contamination. Sometimes it wins for a while. Then the defect returns.
Start with the sheet.
Burrs are one of the most common causes of lamination fanning. A burr may look small on one sheet, but repeated across hundreds of layers it can create a measurable height difference.
Burrs can also scrape insulation, interfere with seating, and create unwanted contact between adjacent sheets.
Control points:
A burr problem is easier to solve at the lamination stage than after the stack has already been pressed together.
Burr direction should not depend on operator memory or random sheet handling.
For some stacks, all burrs may face the same direction. For others, controlled alternation or rotation may be used. The right choice depends on the part design, joining method, magnetic requirements, and assembly process.
What matters most is repeatability.
Poor control looks like this:
That creates a troubleshooting mess.
Better control:
Random orientation makes defect patterns harder to trace because burr direction, coating side, and seating behavior are no longer controlled variables.
Flatness variation can cause fanning even when burrs are acceptable.
A slightly bent lamination may pass a quick dimensional check, but stacked with many others, it can create spring force inside the stack. After compression is released, those layers try to recover. The stack opens.
Check for:
Do not rely only on final stack height. A stack can meet height while still storing internal stress.
Small particles matter. A chip, coating flake, dust cluster, or oil patch can hold layers apart.
Cleanliness controls should cover more than the lamination itself:
Clean parts placed into a dirty fixture are no longer clean parts.
Stacking is not just placing sheets one on another. It is a controlled seating operation.
A stable process usually controls three things at the same time:
If one of these is weak, fanning can appear later.
The sheet should enter the stack without bouncing, scraping, or side impact.
Common problems include:
Better practice:
A stack can begin drifting long before the defect is visible from the side.
For taller lamination stacks, final compression alone may not correct small layer shifts. The lower portion of the stack may already be settled in a poor condition.
A staged sequence is safer:
This is not always slower in real production. It often reduces rework, sorting, and downstream complaints.
Side loading is a quiet defect maker.
It happens when an operator pushes the stack against a wall, when a feeder nudges the top sheet, when a pin is slightly angled, or when a fixture pocket is too tight on one side.
Symptoms include:
If alignment depends on tapping the stack into place, the process is not stable.
Guide pins are useful, but they cannot rescue a poor process.
A guide pin should locate the lamination smoothly. It should not scrape the hole, bend the sheet, pull layers upward, or require force to load.
Too much clearance allows each lamination to rotate or shift slightly. The error may be small per layer, but it can accumulate.
You may see:
Too little clearance creates another problem. The lamination may hang up, scrape, or seat under stress.
You may see:
The correct clearance is not a universal number. It depends on lamination feature tolerance, coating condition, burr height, sheet thickness, stack height, datum strategy, and whether loading is manual or automated.
A practical validation method is better than guessing:
| Validation Check | Good Sign | Warning Sign |
|---|---|---|
| Sheet drop behavior | Lamination drops smoothly and seats flat | Sheet hangs, tilts, or needs tapping |
| Hole condition | No visible scraping | Scratches or coating damage near guide holes |
| Stack after release | Alignment remains stable | Stack shifts when pins are removed |
| Repeatability | Similar results across batches | Alignment changes by lot or operator |
| Pin inspection | Diameter and straightness stay within control limits | Wear, bending, buildup, or scoring appears |
Fixtures wear slowly, so people stop noticing.
Guide pins, pockets, stops, side plates, and base surfaces should have defined inspection intervals. Not just “check when bad parts appear.” That is late.
Fixture wear often shows up as:
The stack is blamed. The fixture did it.
Not always. Often enough.
Compression should seat the stack evenly. It should not crush the stack into temporary obedience.
Three variables matter most:
Too little pressure allows gaps to remain. Too much pressure may damage insulation, increase burr contact, distort thin features, or lock in stress.
The right pressure should be validated by stack behavior:
A non-parallel press face can create fanning even when pressure is high.
If one side of the stack seats first, the opposite side may remain open. More pressure may reduce the visible gap, but the stack can still spring back after release.
Check:
A single height measurement is not enough. Measure around the stack.
Some stacks need a short dwell under pressure to settle before joining or release. This is especially true when the stack includes many thin laminations, coating variation, or bonding material.
Dwell time should be defined, not guessed.
Too short, and the stack may relax. Too long, and production slows without benefit. The answer comes from repeatability checks.
The joining method determines whether the stack stays aligned after compression.
Different methods create different risks.
| Joining Method | Alignment Benefit | Main Risk | Control Recommendation |
|---|---|---|---|
| Interlocking | Fast and repeatable when tooling is stable | Progressive drift or local stress | Monitor interlock position and stack squareness |
| Welding | Strong mechanical retention | Heat distortion, edge pull, or local insulation impact | Clamp close to weld area and control weld sequence |
| Adhesive bonding | Supports many layers over a larger area | Slip before cure or uneven bond thickness | Restrain during cure and control coating or adhesive amount |
| Riveting | Simple mechanical retention | Rivet force can shift layers | Apply force symmetrically and verify hole alignment |
| Cleating or clamping | Useful for certain core styles | Stack may relax when restraint changes | Define clamp load and recheck after release |
| Loose stack before final assembly | Flexible for some processes | High transfer and handling risk | Use sleeves, trays, or temporary compression |
The joining method should not be selected only because it is easy to make. It has to match stack height, lamination thickness, dimensional tolerance, magnetic requirements, and downstream assembly.
A stack should be joined while it is still correctly restrained. Releasing it first and trying to recover alignment later is asking for variation.
Many lamination stacks are fine at the stacking station and bad at the next one.
That means the defect is not only a stacking defect. It is a transfer defect.
The risk is highest when:
Transfer controls can be simple:
If fanning appears after movement, do not keep adjusting the stacking fixture. Watch the handoff.
| Symptom | Most Likely Cause | What to Check First | Corrective Action |
|---|---|---|---|
| One side opens after fixture release | Uneven compression, burr buildup, or fixture release drag | Platen parallelism, burr direction, pin release | Adjust compression setup and inspect burr control |
| Slot alignment drifts while bore looks acceptable | Wrong datum or excess rotational clearance | Datum strategy and guide-pin fit | Align from functional features, not only convenient holes |
| Top layers rotate during stacking | High loading speed, loose pins, or vibration | Drop height, feed motion, pin clearance | Reduce impact and tighten process control |
| Stack height varies around circumference | Burrs, debris, non-parallel pressing, warped sheets | Multi-point height measurement | Clean process, inspect burrs, correct press setup |
| Fanning appears only after transfer | Weak handling support | Transfer tray, lift method, temporary restraint | Add side support or maintain compression |
| Defect increases over production run | Fixture wear or tool wear | Pin diameter, pocket wear, cutting edge condition | Replace worn components and reset inspection interval |
| Random gaps appear between layers | Dirt, oil, mixed sheets, or flatness variation | Cleanliness and incoming inspection | Improve storage, cleaning, and lot separation |
| Stack shifts during welding or bonding | Joining starts before stack is stable | Clamp location and joining sequence | Join while restrained and control heat or cure movement |
| Sheets scrape during loading | Pins too tight, dirty, or misaligned | Pin cleanliness, straightness, surface condition | Clean, polish, replace, or resize pins |
| Stack passes height check but fails assembly | Wrong measurement location or hidden tilt | Height at multiple points and functional datum | Add concentricity, squareness, or slot-position check |
A stable process should answer these questions clearly:
If these answers change by shift, operator, batch, or fixture, the process is not yet standardized.
And yes, some fanning problems disappear when people slow down and follow the same method every time. That sounds too simple. It still happens.
Sometimes fanning is not only a production issue. The stack design or sourcing route may be making the process too sensitive.
A design or supplier process review is useful when:
For custom lamination stacks, prototype builds, or recurring alignment defects, the review should cover lamination geometry, burr direction, datum selection, stack height, fixture concept, compression method, joining sequence, and transfer restraint together.
Fixing only one item may help. Fixing the wrong one wastes time.
| Process Stage | Critical Control | Inspection Method | Reaction Plan |
|---|---|---|---|
| Stamped or cut laminations | Burr height and flatness | Burr gauge, visual edge check, flatness check | Hold suspect lot and inspect tooling |
| Pre-stacking preparation | Orientation and cleanliness | Tray direction check, part wipe, fixture cleaning | Re-sort parts and clean fixture |
| Loading | Smooth sheet seating | Operator observation or vision check | Stop if sheets hang, bounce, or scrape |
| Intermediate stacking | Early drift detection | Top-layer alignment check | Reseat before full stack is built |
| Compression | Height and parallelism | Multi-point height check | Adjust pressure, dwell, or platen setup |
| Joining | Stability under restraint | Post-join alignment check | Review clamp and joining sequence |
| Fixture release | Spring-back or release drag | Immediate side-gap check | Inspect pins, release path, and burr direction |
| Transfer | Handling stability | Post-transfer inspection | Add tray, sleeve, or temporary compression |
| Final inspection | Functional alignment | Bore, slot, OD, squareness, or runout check | Sort, contain, and trace root cause |
Lamination fanning is the opening, spreading, or uneven stepping of individual sheets in a lamination stack. It usually appears at the stack edge, bore, slot area, or after the stack is released from the fixture.
The most common causes are burr buildup, mixed burr direction, poor guide-pin clearance, worn fixtures, uneven compression, sheet flatness variation, contamination, high loading speed, and weak support during transfer.
Burrs create high spots between layers. Across many laminations, these high spots can act like wedges, causing tilt, uneven height, edge opening, and poor seating. Burrs can also damage insulation between layers.
Not always. The correct burr direction depends on the stack design and process. Some stacks use one controlled direction; others use an alternating or rotated pattern. The important point is that orientation must be defined and repeated.
Guide pins help control location, but they cannot solve every problem. If burrs are high, sheets are warped, pins are worn, clearance is wrong, or compression is uneven, fanning can still happen.
There is no universal clearance value. Guide-pin clearance should be based on lamination feature tolerance, burr height, coating condition, sheet thickness, stack height, loading method, and functional datum. The pin should guide the sheet smoothly without scraping, hanging, or forcing the hole position.
This usually means the stack was being held in position by the fixture but was not stable by itself. Possible causes include spring-back, burr buildup, uneven compression, pin drag, poor joining sequence, or insufficient restraint before transfer.
Use staged stacking. Load a defined number of sheets, apply light seating pressure, check alignment, and repeat. Do not wait until the full stack is built before applying control.
The stack may have shifted before joining, or the joining process may have introduced heat, force, shrinkage, or slip. The stack should remain restrained during welding, bonding, riveting, or interlocking.
Use the functional datum of the stack. Depending on the design, this may be the bore, slots, outer diameter, pilot holes, tooth position, or step geometry. Inspection may include go/no-go gauges, vision systems, dial indicators, runout checks, squareness checks, or multi-point height measurement.
Start with five checks: burr height, burr direction, guide-pin condition, press parallelism, and transfer handling. These areas reveal many common causes quickly.
Consider fixture changes when defects repeat on the same side, alignment varies by station, sheets scrape during loading, pins show wear, or stacks shift after release even when incoming laminations are stable.
Compression can reduce visible gaps, but it cannot always fix root causes. If the problem comes from burrs, contamination, poor orientation, worn guides, or transfer movement, more pressure may hide the defect temporarily and create other damage.
A capable supplier should review the complete process: lamination cutting quality, burr control, orientation method, fixture design, compression sequence, joining method, and handling between operations. For custom stacks, this review is often more useful than adjusting one tolerance in isolation.
Lamination fanning is rarely a single-defect problem. It is usually a control problem.
The stack needs consistent sheets, a clear datum, clean guiding, square compression, stable joining, and protected transfer. Miss one of those, and the stack may still pass one inspection point. It may not survive the next process.
For recurring fanning, misalignment, or unstable stack height, review the whole chain from lamination edge quality to final handling. That is where the real cause usually shows itself.